(don’t miss the video and free blank image downloads below!)
One of the first things you need when you start blogging, selling online, or getting into social media, is a button or profile image. But wait, that’s not all… you’ll probably end-up needing dozens of images all over the place. For example:
- Etsy banners
- Facebook Cover Photo
- Profile Photos for Facebook, Google+, etc.
- Blog advertisement graphics
- Graphics for your own blog or shop
- Tags for your Etsy shop items
- Business cards
- etc., etc., etc.
Use PicMonkey for Free to Create Buttons and Banners
I wrote a quick post the other day about how awesome PicMonkey is for photo editing and doing simple things like placing text on-top of your images.
Today we’re going to show you how to go even further and create entirely custom graphics.
All you need is some time, a warm cup of coffee, maybe some clip art or images you want to use, and a whole bunch of creative can-do attitude.
Video or Pictorial Tutorial — You decide!
Pictorial tutorial? Don’t laugh. I don’t know what else to call it. It’s first and the video, done by my hubby Tim, is second.
Step 1
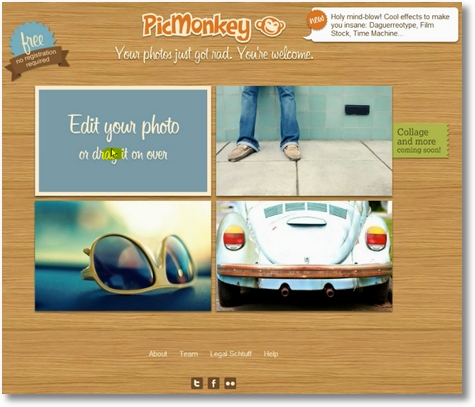
Visit PicMonkey.com and click on “Edit Your Photo“. Then, using the free files provided at the end of this post, choose whichever size you want to work with.
For the purposes of this tutorial we’re using the 200×200 size.
Step 2
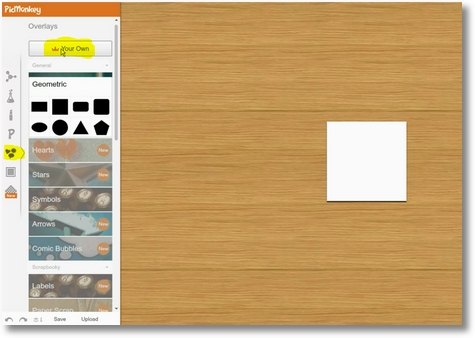
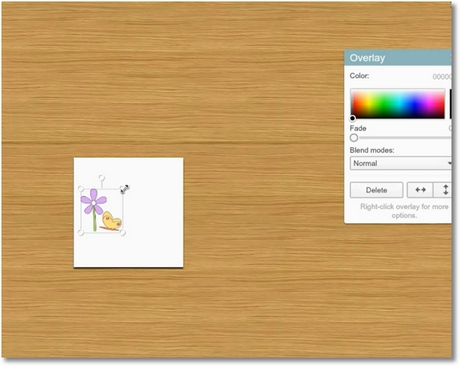
Once you open the blank image you’re going to work with, you’ll have a plain white box on the screen.
Using the menu icons on the left, go down and click “overlays” which has an image of a little heart and a couple of cartoon talk bubbles.
Once those options reveal themselves, you’ll see a button at the top labeled “your own”… choose that one.
Step 3
The previous step will lead you to bring in another image to this image. The real key to success in creating great graphics is in having a great selection of images to choose from.
Before you start, collect a group of images you want to work with. You may want to crop just particular parts of images, or download various clip-art and graphics from the Internet.
You can also use things you already have had made such as your logo.
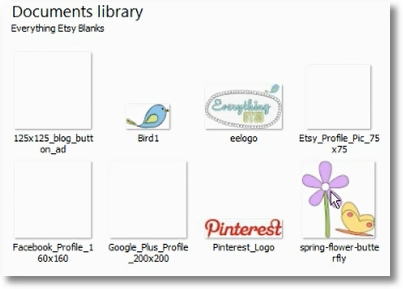
For this tutorial, we’ll just choose a simple image of a flower and a butterfly that I had on my computer.
When you select an image, PicMonkey will bring that image into your file as a new layer.
You can resize that image and move it around as you wish.
Step 4
You can then start adding elements to your design. In this example I’m adding a rectangle and choosing a color to give the effect of grass under the flower.
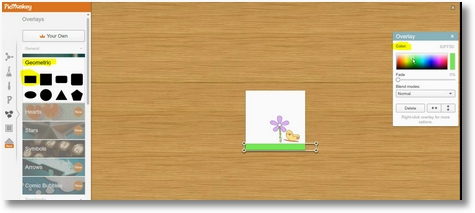
You can play with the large number of overlays available within PicMonkey, or you can add more images of your own.
Step 5
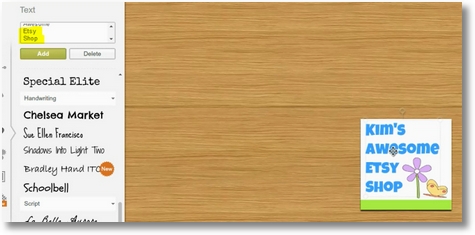
Add some text and play with fonts. PicMonkey comes with a great selection of fonts. All free. (for now, they hint toward charging one of these days)

You add your words in the little text box above the list of fonts. Make sure you use “enter” to create any line breaks you want in that text box. You can also do each line of text as a separate layer.
Your text options include:
- font
- size
- color
- opacity (called fade)
- left, center, or right justify
Move your text around, play with colors, and even adjust line breaks. As you can see above, I had “Etsy Shop” on one line, but I decided to put shop on another line. I did that by going to the box at the top of the list of fonts and moving Shop to the next line there.
Step 6
Learn to use layers.
It’s important to think of your work in terms of layers. Each time you add something, that is a new layer. They go in order of placement unless you change it.
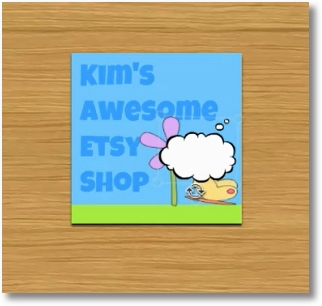
So at this point my image is a “stack” of layers in this order, the top (number 1) being the most recently added item:
- Kim’s Awesome Etsy Shop
- The green rectangle at the bottom
- The image of the flower and butterfly
- A blank white square
I’ve decided I want a little bit of the flower to go over top of part of the words. So I need to move that layer up to be above the words.
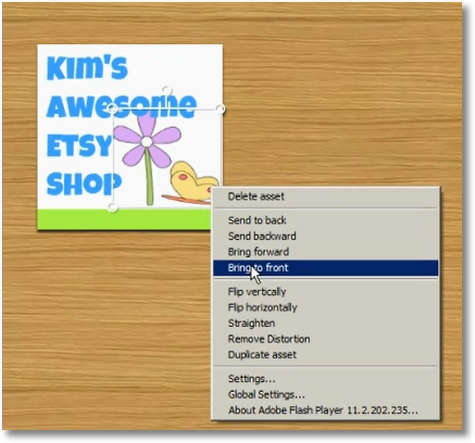
I right-click on the image I want to move and choose “bring to front” which takes it all the way to the top. You can also move layers up or down one step at a time by choosing “bring forward” or “send backward”.
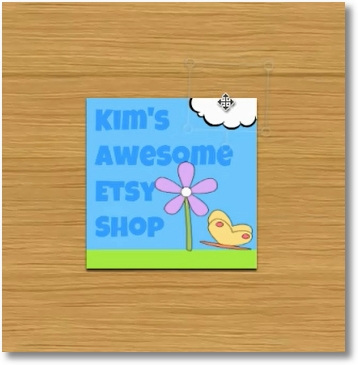
Step 7
Finalize your design.
I added another rectangle to create a blue background. Then I added a talk bubble and flipped it upside down to create a cloud.
Any part of an item that you drag outside of the original image area will not be saved, so I could use only part of the talk bubble. I left the little arrow out of the image.
Step 8
Save your image! You’re done.
The save button is at the bottom of the left column. Then choose a name for your image and you’re all good.

That’s it!
Like I said, the hardest part is having “components” to work with. You’ll learn to find stuff online, how to create your own parts, and how to crop other images to create parts.
With a little practice, you’ll be creating incredible buttons and banners in no time!
See More Detail in The Video!
The video below follows all of the steps above and discusses them in much greater detail. It also goes on to start on an Etsy Shop Banner and demonstrates how to use a picture from your Etsy shop in the banner creation.
Free Blank Image File Download
Just below is a link to a zip file with all of the blank images you’ll need to work with.
Using a Windows computer you usually just right click on the link above and choose “save link as” or “save target as” and then save the whole folder to your computer.
Then you find the folder and right-click on it again, then choose something like “unzip” or “extract”. I usually choose the option that creates a new folder, such as “extract to folder”. This creates a new folder on my computer that has all of the above images inside.
NOTE: If you have trouble downloading the entire ZIP file, the sizes below are linked directly to that particular image so you can get them one at a time. When you click on these files a new window will open. You won’t be able to see the picture because it’s solid white, but it is there. Right-click and choose “save image as” to save it to your computer.
The folder above includes all of these:
- Facebook Profile Image (160×160)
- Facebook Cover Photo (851×315)
- Etsy Shop Banner (760×100)
- Etsy Profile Image (75×75)
- Standard Blog Button (125×125)
- Google+ Profile {and our large ad size} (200×200)
- EverythingEtsy.com Ad(100×100)
- EverythingEtsy.com Ad(200×100)
Enjoy and keep learning!
~ Kim & Tim
Thank you so much for this detailed tutorial! I miss picnik, but picmonkey is just as good if not better.
This looks like fun! Thanks for sharing. 🙂
This info. is so helpful-thank you. I also have started using PicMonkey and love it. It is so simple to use.
Your material is being printed off and put into my ESTY binder for when I set up my shop.
Small House / Big Sky Donna
http://smallhouseunderabigsky.wordpress.com
Thank you so much! I had no idea how to use this feature. I am so thankful for PicMonkey.
Great tutorial and photos.
Thank you Kim, it is a great program– it’s like a mini photoshop 🙂
Thank you so much Kim! I am going to try making a banner for one of my other online boutique. I use picmonkey for editing my photos but will now try this as well!
Thanks! I’ve never understood layers before and the blank file are such a help.
Wow! Thank you for taking the time to put this together. It is so very useful.
Well thank you very much – I am now obsessed with figuring our picmonkey and have spent HOURS fiddling with photos. So, the million $ questions is this – can you tell me how to make the background white? All of the really great photos have completely white – or absent – backgrounds. I would love to know how to do this for myself. Thanks.
Hi Tricia,
I think you’re talking about situations where you cut an item out of an image and then place only that item over top of a solid white background. This would result in something like the ad at the top of our medium ad section right now with baby shoes in it.
I don’t think PicMonkey has an option for tracing an image. The photo editor at Pixlr.com does have a tool for this. It’s called the Lasso tool. You zoom way in and carefully draw a line around the item you want to get, then cut/paste it into the image you’re working on.
It’s a bit complex getting that from Pixlr to picmonkey. I’d just do the whole thing in Pixlr if that were me.
We have a tutorial for using Pixlr to personalize one of our free Etsy banners. Here: https://www.everythingetsy.com/how-to-personalize-your-free-etsy-banner-step-one/
Hope that helps.
Tim
Wonderful post. I loved Picnic and now use PicMonkey and love it. I haven’t used all t he tools yet so this gives me plenty of ideas. Designing my own banner was easy on Picnic and even better on PicMonkey.
Hope they don’t change and continue to be free.
Just want to say THANKYOU!!!!! this was a great tutorial. I just made a facebook cover and had so much fun. You are the best. Can’t wait to make my etsy banner next!!!
Thanks for these great tutorials. I also loved Picnik and was so sad when it went away but I’m so ecstatic that PicMonkey was around to fill that void! I used Picnik for EVERYTHING (and mostly because of the fonts) There is a paid upgrade version (or maybe it’s free until they charge) which makes more of the features available. Anything with a crown on the feature is a paid feature. Picnik had the same thing and I think it was only $5 a month or something. Again, thanks for providing this amazing resource!
Thank you so much for taking the time to create and share this tutorial! You guys are a life saver!! I have struggled with trying to make my own stuff and you just showed me how to solve my problem… layers (insert Happy Dance)!! I found you via a Pinterest pin and boy-oh-boy I’m so glad I came by. You have a new follower 🙂 Thanks again! AJ@queenofmynest
Thank you for an awesome tutorial! I found you on You Tube. I am just beginning my blog and am grateful for the tutorial!
I have to say how awesome this program and tutorial works!! I have an online shop online on both my website and now ETSY and the banner looks amazing and it took a minute to create. I will use this for all my photos from now on. It works great! thanks
This site was not only helpful but FUN! Very cute, too. As someone just starting out with a website and learning as I go, I now have great respect for all the work that goes into the creation and maintenance of a well-done site. Oh, and I never heard of PicMonkey until now-but what a great site! thanks for all the free templates. I will definately put a link to your site on my site!
Thank you so much for this tutorial! I’m not a graphics novice but getting my logo just the right size for my Etsy profile pic was driving me crazy! Thanks for the help!
Hey, Tim and Kim. Thanks for the great tutorial. I’ve created the 125X125 blog button to use as an ad on other blogs, but now I need to know how to get it to link back to my blog. Any tutorials for that that you know of? BTWm Tim, I’ve been a fan of your blog for forever and was pleasantly surprised to discover that this was you 🙂
Thanks so much for posting this! It’s soo helpful. I’m going to start practicing and trying to make a new banner. SO EXCITED! 😀
Thank you so much for this tutorial and getting me hooked on PicMonkey! I just started blogging and I’m in the process of starting an Etsy shop. I had no idea how much went into it all and never knew how to make banners or edit photos at all until today. Thanks!
I’m so happy to hear that you were able to use it! Starting a shop can take a good bit of time…but it’s worth it! Have fun!
Thanks so much for this – it was really useful.
Thank you for the useful information. This will come in very handy and make my life a lot easier!
I feel so stupid…lol. I watched the your video about Picmonkey, but I couldn’t figure out how to make a blank image. I’ve spent a couple hours researching the net for info, failing each time. Then I open up this page and read…thank you for providing the blank images! My head is about to burst from all the searching and here is was right here. Should have known you would cover that too Kim. Love PicMonkey! I’ve been playing with pictures and it’s so much fun. Well off to make my new banner. Thanks again.
So as of recent they now charge to use these features on Picmonkey which is sooo disappointing. I had been using them for a while and came across your blog and just LOVED it! It helped me make my etsy banner. So, do you know of any other sites I could do this on now that picmonkey is a pay site?
These are so great and so is the video! Do you have any of the pre-made little boxes for blog banners? What size would I use? Also, where can I get cute FREE PNG clipart? It seems like most I find is not PNG so it has a white box behind it!
I’ve been wondering about making a blog button and you have answered my question – will give your tutorial a try when I can. Thank you!
Kim, your site is my new go to for easy to follow tutorials and great web marketing tips!! Thanks so much for all you do!!
Julie
What’s Taking place i’m new to this, I stumbled upon this
I have found It absolutely useful and it has aided me out loads.
I’m hoping to give a contribution & help different customers like its helped me. Good job.
Love this! thanks so much!
Thank you! So helpful.
No por acaso que Homens, mulheres e jovens acessam e acabam sse tornando divulgadores.
A qualidade de informaes relacionadas a Trabalhe em casa, trabalhar em casa, trabalho em casa
tm feito a diferena, em relao a outros sites.
o para determinados tipos de empresas, por exemplo, as multinacionais com sede em v.
looking good
nice post