
Hi, I’m Vanessa from Punkin Patterns. I’m excited to be back here today on Everything Etsy to share with you this great tutorial.
Spring is upon us and it’s time to make some skirts!
Skirts can be an easy addition to your wardrobe and easy on the wallet too — especially if YOU make it. These skirts have great, deep pockets. So useful and practical. Every skirt should have pockets!
The Easy Peasy Skirt with Pockets is simple enough for even the beginner sewer and a quick sew for a seasoned pro. The skirt I’ll be showing you how to make has a stripe at the bottom. For more variations on the Easy Peasy Skirt visit my blog.
The first thing you’ll need is to measure your waist (we’ll call this W) and distance from your waist to where you want the skirt to fall (we’ll call this L). I wanted my skirt length to stop just below my knees so for me that was 20″.
So let’s determine the width of your skirt. If you want a full skirt you’ll need two pieces that are W x 2. For a less full skirt do W x 1.5. I made a full skirt. Once you’ve determined the width of your two fabric pieces let’s determine the length you’ll need to cut.
If you’re making a skirt out of a solid piece of fabric, you’ll just take your desired length measurement add 1/2″ for the bottom seam and 2.5″ for the elastic casing. This casing size is enough room for a 1.5″ wide elastic. If using a 1″ wide elastic, you’d only have to add 2″, and so on.
Because we’re adding pockets, we’ll be using two panels (a front piece and a back piece) to assemble our skirt. It is also useful to assemble it in two pieces if we’re making a skirt for someone other than a small child.
So our final dimensions for our two panels (for a full skirt) are:
Width = W ( + 1″)
Length = L + 3″
We add the one inch to the waist (W) measurement for seam allowances.
If you’re making a less full skirt, the width of each of your two panels would be:
Width = (W x 0.75) + 1″
If you want to add a 4″ stripe at the bottom, you’ll need to change your length measurement. So for the main fabric length we take off the stripe length and add still add our 2.5″ for the casing and 1/2″ for a seam allowance. To the stripe length, we add 1/2″ seam allowance (to sew it to the top piece) AND 1/2″ for hemming at the bottom.
Main Fabric Length = (L – 4″) + 3″
Stripe Fabric Length = 4″ + 1″ = 5″
So there you go:: You’ll need to cut two pieces of each the Main Fabric and Stripe Fabric.
Main:: Width = W + 1″
Length = (L – 4″) +3″
Stripe:: Width = W + 1″
Length = 5″
Now that you’ve got that cut out, you can cut out your pockets. Use the pocket template found here. Cut out the two pieces and tape them together overlapping the shaded portions. Cut out two pockets on the folded fabric (so you end up with four pieces).
For your elastic piece, I like it a few inches shorter than the waist measurement. You can simply put the elastic around your waist and see what feels right. Allow for an inch of overlap on each end.
Now we can start sewing!
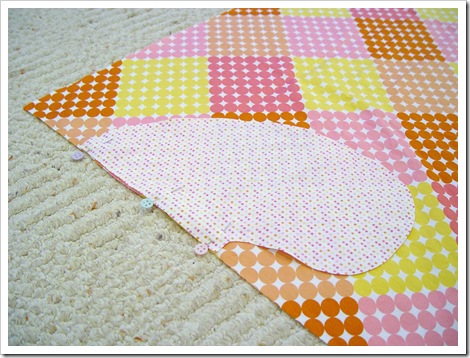
Lay down your main fabric top piece. Pin a pocket piece 5″ down from the top, right sides together (as shown). Sew in place with 1/2″ seam allowance. Zig-zag the edge next to the seam you just made. Repeat on the other side of the front panel. Then repeat for the back piece.
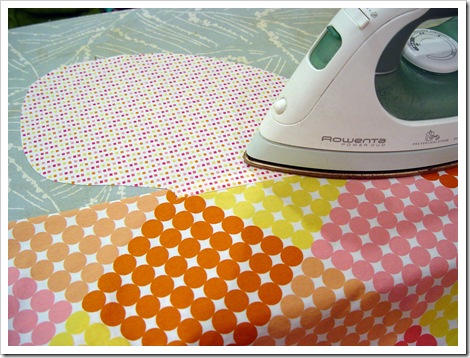
Iron the pocket flat. Now all right sides are facing up.
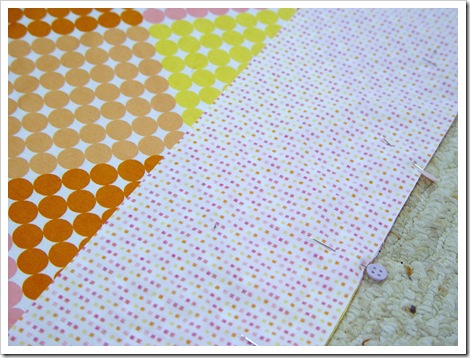
Pin the bottom stripe to the bottom of the main piece, right sides together. Sew with a 1/2″ seam allowance and then zig-zag or serge the raw edge.
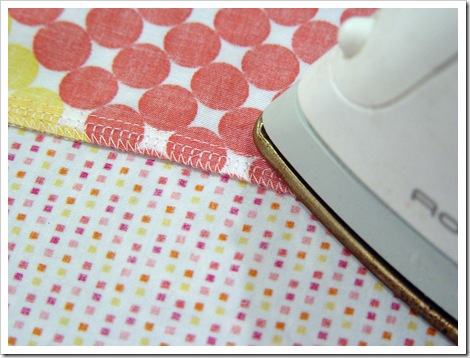
Fold the finished edge toward the bottom stripe and iron flat.
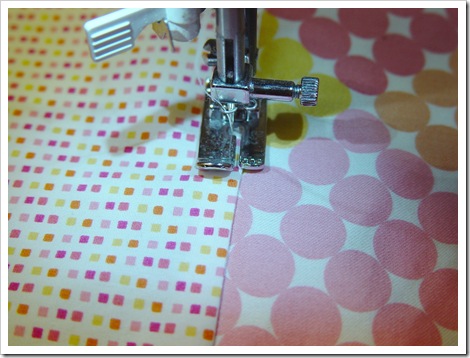
Top stitch this down to keep it flat.
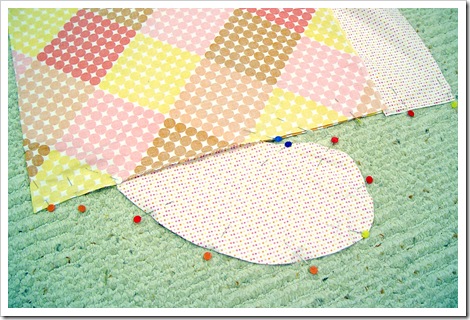
Place the bottom and top pieces together, right sides together. Pin the sides together, going around the edges of the pocket too. Sew down the side of the skirt, going around the pocket outer edge and continue to the bottom. Finish the raw edge with a zig-zag or use a serger. Repeat on the other side.
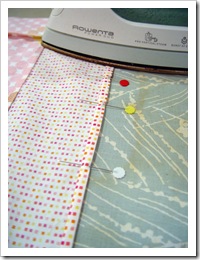
Hemming the bottom edge by folding the raw edge at the bottom of the skirt up 1/4″. Press. Fold up an additional 1/4″ and press. Pin in place and sew in place with a seam close to the upper edge of the fold.
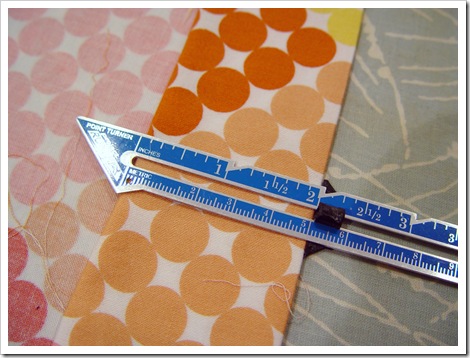
Now let’s finish the top. To make the casing for your elastic, fold down the top edge 2.5″ and iron in place. Fold the raw edge under 1/2″ and iron. Pin in place.
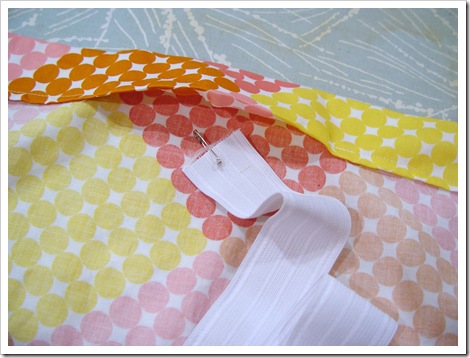
Sew around 1/4″ from the bottom of the folded edge leaving an opening of about 3 or 4 inches unstitched. Place a safety pin at one end of the elastic and start feeding it through the hole you left in the casing. Place a safety pin at one end of the elastic and start feeding it through the hole you left in the casing.
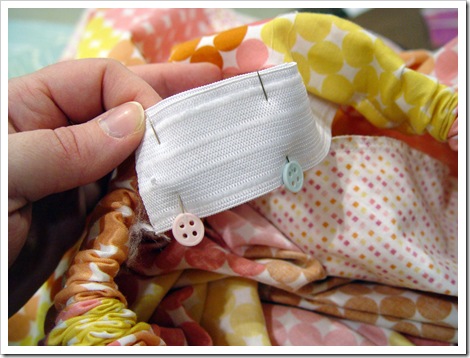
When you’ve gotten the elastic all the way through the casing, pin the two ends of the elastic together with a 1″ overlap and sew in place.
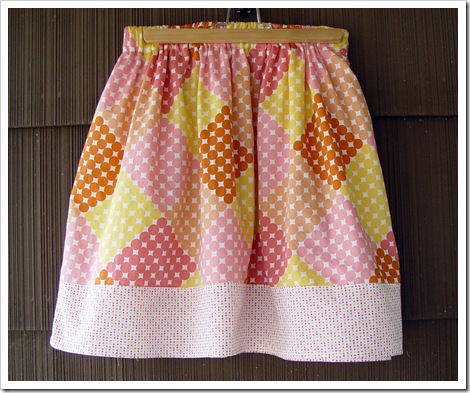
Tuck the elastic into the casing and sew up the opening. And you’re done!
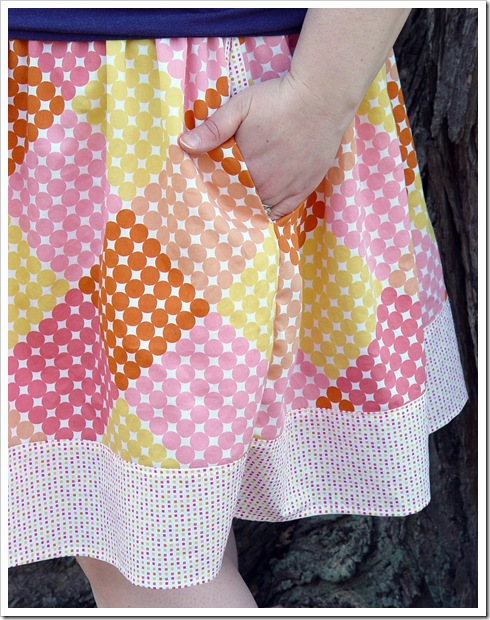
There you have it…an Easy Peasy Skirt with Pockets by Vanessa from Punkin Patterns! Thanks for sharing your awesome tutorial with us!
Are you getting ready for warm sunny days by sewing up a little something sweet? I’d love to hear about it!
~Kim
Love Sewing Tutorials??? Check out this list of 101 Simple Sewing Tutorials for Summer! There are bunches of easy peasy pretties on there! 🙂
If it’s still snowing where you live this one is for you… 101 Sewing Tutorials for Winter!
Cute! I have some perfect fabric for this! Thanks for the tutorial!
This is so cute! Thanks for the tutorial!
This is so adorable and easily done. I love the colors you have. So neat.
Also, I was wondering where did you get those adorable button pins…….I love them.
Hi, my name is Wendy, and I don’t know how to sew. Phew! So glad to get that off my chest! But I have dreams of learning to sew and I think this project would be a blast! But I don’t understand the width thing. Is each of the two panels supposed to be twice the waist measurement? So the overall width would be four times the waist size? Any help you can give me here would be greatly appreciated!
Perfect for spring! I’m getting ready to sit down at my sewing machine and this will be a great project!
I’m just a beginner sewer but I’m working on this skirt this weekend. It’s so easy! Going to make my stepdaughter a matching one, also.
Made it in 45 minutes for my two year old. Easy and cute. I botched the pockets a bit because I did not look at the design of yours enough. They still work but are not as deep. Thanks foe the pattern
Where did you get that kind of ruler (with the moveable middle piece to help with casing measurements)? or what is that called?
thanks
The ruler is a slide(?) ruler. it will be near the tape measures and pins in the fabric store.
I LOVE this! thank you for putting this together as this is EXACTLY what I want for my summer wardrobe!! I have a 15 mo old daughter who LOVES going to the park and I HATE shorts because they don’t fit me right. I just made one for knee length and can not wait to go to the store tomorrow for more fabric!!
THANK YOU!!!!
Hi! I just started learning how to sew about a month or two ago. I just made this skirt–it took two evenings. I’m getting lots of compliments on it! Thank you for making such an easy-to-understand-and-execute tutorial available!
I made this to match a dress I made for my granddaughter and her American Girl doll. Since the picture looked full I made the width narrower like she did. BE CAREFUL! If you have a “tummy or hips” you will make a big mistake. I cannot wear this because it turned out like a straight skirt. And the pockets stick out because it is too tight. It is fast to make and I have more material to make another but I will make it wider than what she did in her pattern. I’m not a huge woman just have the “baby and age” tummy. Just disappointed about the skirt. Our granddaughter lives 12 hours away by car and we are visiting in three weeks.
Well I made another and it turned out perfect! Not sure what I did wrong last time but this one is perfect. I might try making the next one less full
I made it in 2 1/2 hours. Yeah!
Awesome…thanks for stopping back by and letting me know!
~Kim
I need some help to make sure I cut this skirt correctly. This is the first attempt at the skirt for an adult and I’m making it for my sister. HELP.
Okay so her waist is about 32 inches and her length is about 17 inches – We are doing the two fabric pattern(with the stripe) Can you help me make sure my match is correct and I’m understanding everything correctly?
So her width is 64 and her length is 17 right?
I cut EACH panel –
W+1 = 64 +1 which is 65
L-4)+3 = 17-4=3) + 3 = 16
so the width of each panel is 65 inches wide by 16 inches long ???? Right?
The stripe is w + 1 = 65 plus L= 5 so the stripe will be 65 wide by 5in long right?
Using 1/2 seem allowance this will give me a skirt that is 17 inches long when finished right?
Please help me understand it.
Hi, I’m sort of a beginning sewer too, so maybe this is a dumb question — I think I understand how to get the measurements. But that didn’t help me know how much fabric to get, in yards, when I go to the fabric store….am I missing something easy? Thanks, Kim
looking good
nice post