• Tutorials
  • Ikea Hacks
  • Free Printables
  • Holiday
  • Handmade Gifts
  • Etsy Business

EverythingEtsy.com

Etsy Blog | Selling on Etsy | Etsy Banners | Giveaways & Creative Stuff

You are here: Home / Tutorials / DIY Ombre Painted Utensils

DIY Ombre Painted Utensils

By Kim Layton 15 Comments

Hi, I’m Jaime from Raising Up Rubies, come on…let’s make stuff together ♥

so I’ve been spending a lot of time at Target lately πŸ™‚

checkin’ out the super cute stuff for summer…I’ve had my eye on these paint dipped bamboo utensils

have you seen ’em??

but at $8 a pair…my brain’s thinkin’ we can make these

really just ’cause it’ll be downright fun…

so I spend a lot of time on Pinterest too πŸ™‚

(don’t we all?)

and I’m noticing all things ombre…which totally floats my boat

I love anything that has graduated colors

(i’ m a sucker for color)

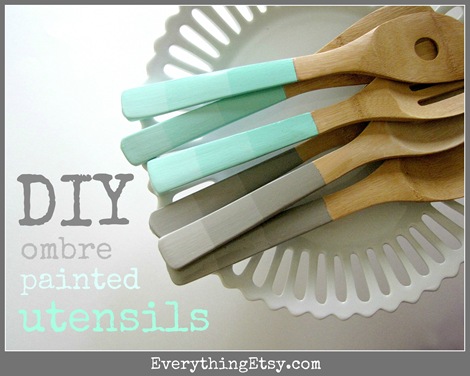
the 2 ideas were merged to create these pretties in the photo above ♥
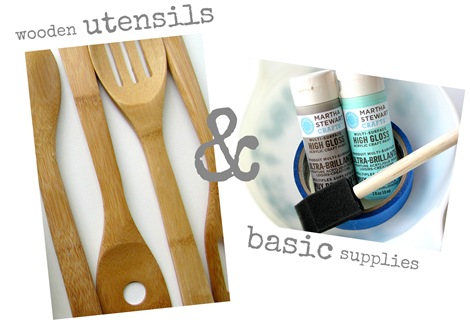
just a few things

oh so very simple to do in an afternoon of crafting

(bonus: you can get other stuff done during drying time in between coats)

so let’s start with just a few things…

~ just a few things ~

Supplies needed:

1. acrylic paint colors that you ♥

2. white acrylic paint (not pictured)

3. brush

4. painters tape (at any hardware store)

5. if needed ~  polyurethene (also not pictured)

(the poly is optional for heavy usage & durability…will get to this later πŸ™‚

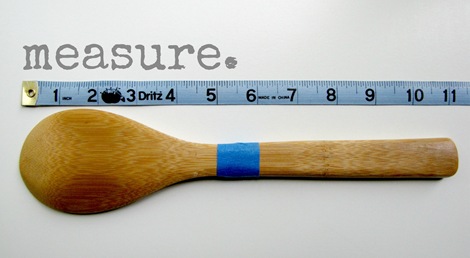
measure

~ measure ~

using the tape, mark each utensil at the desired height

be sure to press firm to keep any paint from bleeding through
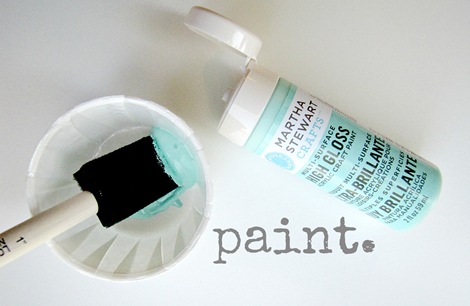
paint

~ paint ~

bust out the cuteness! & paint up to the tape

i did two coats of the first color with 30 minutes of dry time in between each one
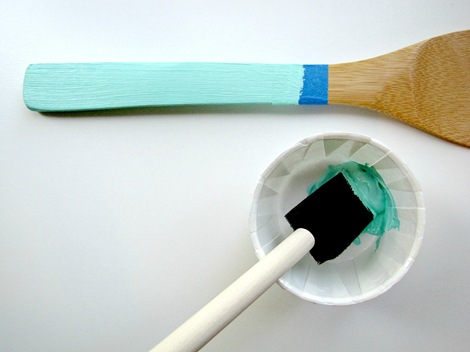
first color

~ first color ~

in the same paint mix in some white paint to achieve the graduated color your looking for

more white = lighter shade

less white = darker shade

(just sayin’ πŸ™‚

apply a new piece of  tape  1/3 of the way down each time, again making sure to press firm

(really make sure the paint is dry between each coat…so it doesn’t peel off when you remove it)

here’s the graduation of color…
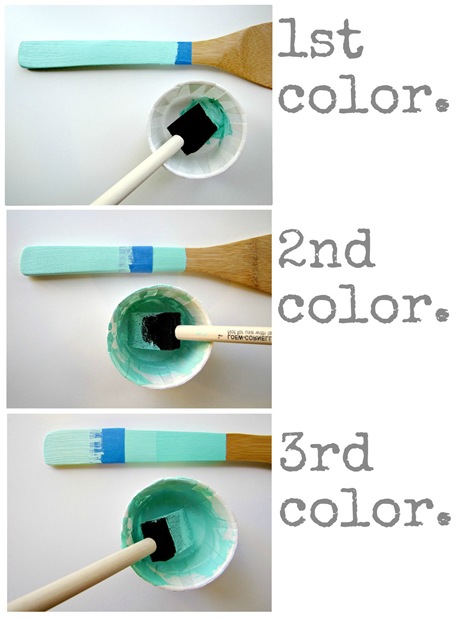
1-2-3

~ 1-2-3 ~

repeat the same process 2 times!

(for the 2nd & 3rd color I only needed one heavy coat since the first color really covered the wood)

so as I mentioned earlier about the polyurethane…

i had a can left over from another project

I completly submerged each handle into the poly right up to the paint line then hung them to drip dry completely, then repeated that process 2 more times

it really makes them shiny & super scratch/wash proof

the paint I used was multi-surface Martha Stewart  High Gloss enamel paint

it says on the label that it is water & weather resistant πŸ™‚ so I’m thinking you don’t need to coat it with a polyurethane

but can if it makes you feel better about them enduring lots of use

just a side note: if you do dip it, be sure not to use the handle side in any part of the cooking process!

(again…just sayin’…but hopin’ you already know that πŸ™‚

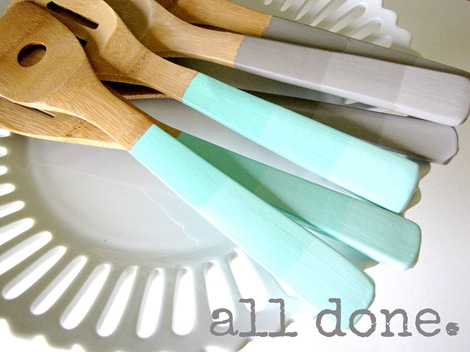
all done

~ all done ~

so easy right?! and super cute ♥

i think these make me want to cook more πŸ™‚

much loves

~Jaime

Meet Jaime…Everything Etsy’s new contributor!  I know you are going to love her as much as I do!

Hi I'm Jaime photo new

My name is Jaime from Raising up Rubies ♥ stay at home mama to 2 girls and wife to a handsome hubby

…my love is for all things crafty and i feel so blessed to have a super cute space to play & create in…

I’m super happy to be here as a regular contributor for Everything Etsy…a real pinch me please moment!

She’s super talented!  You can find out more about Jaime on her blog…Raising Up Rubies.

Related posts:

  1. Queen’s Guard Peg Dolls {Tutorial}
  2. Felt Ombre Wreath Tutorial {Burlap+Blue}
  3. Rosette Necklace Tutorial – DIY Gifts
  4. DIY Lavender Body Butter

Filed Under: Tutorials Tagged With: cooking, diy, gift, housewarming, kitchen, ombre, painted, Tutorial, utensils, wedding gift

Comments

  1. Beth Beal says

    May 31, 2012 at 11:41 am

    This is fabulous!

    Reply
  2. megan says

    May 31, 2012 at 12:19 pm

    love that idea, have been looking for quick add on for when someone purchases an apron and was thinking sm wooden spoons… this would spruce them up… I could even colours to match!

    Reply
  3. Monsterscircus says

    May 31, 2012 at 3:13 pm

    Wow that’s a really cute idea with the fading! I’m also dip dying everything. Have a wonderful day.

    Reply
  4. Kim says

    May 31, 2012 at 3:38 pm

    Megan – What a cool idea! A spoon would be such a cute addition to your aprons. Thanks for sharing your plans!

    ~Kim

    Reply
  5. Jessica says

    May 31, 2012 at 9:23 pm

    I keep seeing this DIY project in various places. I’m taking it as a sign that this should be added to my “to-do” list. Thank you for showing me just how simple it is πŸ™‚

    -Jessica

    Reply
  6. Carla says

    May 31, 2012 at 10:40 pm

    What a cute idea – I love these!

    Reply
  7. Adam says

    June 1, 2012 at 7:03 pm

    We don’t have a lot of wooden utensils, but they might be getting a remake really soon. This is a great idea!

    Reply
  8. Serena says

    July 24, 2012 at 5:12 pm

    I absolutely LOVE these. Where did you get the wood utinsils? I like the style of those ones!

    Reply
  9. Jaime β™₯ Raising up Rubies says

    July 24, 2012 at 11:37 pm

    Hi Serena! thank you!
    I actually found these at a yard sale new & unopened!! …but have seen similar ones at Target or Walmart πŸ™‚

    Reply
  10. Ruby Burns says

    August 4, 2012 at 3:13 pm

    Just marvelous DIY. But I love anything I can do myself.

    Reply
    • Kim says

      August 5, 2012 at 2:51 pm

      I understand, Ruby! Some of us love to make anything we can ourselves. πŸ™‚

      Reply
  11. Lesley says

    September 22, 2012 at 8:54 pm

    I did this today and they turned out so great! I did blues, yellows and greens. Thanks so much for the awesome idea!

    Reply
  12. Jaime β™₯ Raising up Rubies says

    September 24, 2012 at 10:32 am

    you’re welcome Lesley! i’m so glad it was a success for you… aren’t they fun?!

    Reply
  13. golu dolls says

    August 15, 2018 at 8:50 am

    looking good

    Reply
  14. kanchipuram sarees says

    August 15, 2018 at 8:51 am

    nice post

    Reply
Previous Post Vintage Inspired Workspace – The Backyard Bungalow
Next Post Weekend Projects

Leave a Comment Cancel reply

Your email address will not be published. Required fields are marked *

This site uses Akismet to reduce spam. Learn how your comment data is processed.

  • Bloglovin
  • Facebook
  • Instagram
  • Pinterest
  • Twitter

Never miss a post:

Enter your email address:

Sell doTERRAEssential Oils How to Start a Blog for Your Etsy Business

Β 


follow EverythingEtsy on Pinterest


Disclosure: Various posts and pages on this site include affiliate links. We could earn a referral fee if you make a purchase through those links. Your purchase won't cost you more because you followed our link and we only refer you to sources we can personally recommend.

RSS Now at HandmadeandCraft.com

  • 12 DIY Kitchen Ideas
  • 15 Easter Cupcake Recipes
  • Organize with a Chalkboard Wall Calendar!

RSS Now at KimberlyLayton.com

  • St. Patrick’s Day Crochet Shamrock Pattern & Video Tutorial
  • Printable Coloring Pages for St. Patrick’s Day
  • How to Get Your Business Featured on Blogs

[footer_backtotop]

Copyright © 2025 EverythingEtsy.com Β· All Rights Reserved Β· Privacy Policy Β·


The term "Etsy" is a registered trademark of Etsy, Inc. - This site is not affiliated w/ Etsy, Inc.
This website uses cookies to improve your experience. We'll assume you're ok with this, but you can opt-out if you wish. Cookie settingsACCEPT
Privacy & Cookies Policy

Privacy Overview

This website uses cookies to improve your experience while you navigate through the website. Out of these cookies, the cookies that are categorized as necessary are stored on your browser as they are essential for the working of basic functionalities of the website. We also use third-party cookies that help us analyze and understand how you use this website. These cookies will be stored in your browser only with your consent. You also have the option to opt-out of these cookies. But opting out of some of these cookies may have an effect on your browsing experience.
Necessary
Always Enabled
Necessary cookies are absolutely essential for the website to function properly. This category only includes cookies that ensures basic functionalities and security features of the website. These cookies do not store any personal information.
Non-necessary
Any cookies that may not be particularly necessary for the website to function and is used specifically to collect user personal data via analytics, ads, other embedded contents are termed as non-necessary cookies. It is mandatory to procure user consent prior to running these cookies on your website.
SAVE & ACCEPT