• Tutorials
  • Ikea Hacks
  • Free Printables
  • Holiday
  • Handmade Gifts
  • Etsy Business

EverythingEtsy.com

Etsy Blog | Selling on Etsy | Etsy Banners | Giveaways & Creative Stuff

You are here: Home / Tutorials / The Best Hair Ties Ever {Tutorial}

The Best Hair Ties Ever {Tutorial}

By Kim Layton 11 Comments

The Best Hair Ties Ever {Tutorial} on EverythingEtsy.com

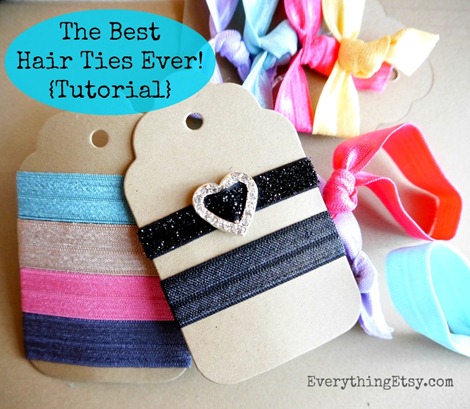
The Best Hair Ties Ever!

There’s always a time when you need to put your hair up!  You will want to make a million of these because they definitely are the BEST HAIR TIES EVER!

They won’t pull your hair, they’re adjustable, they can be made in any color, wear one or wear three, they can be worn as colorful bracelets, they fit in your pocket nice, they’re cheap, they’re easy to make, and they’re great little handmade gifts.

How about that for a few reasons to give this tutorial a try??  You will love them, trust me!  I’ve been using them for months and I can’t say enough nice things about them. 

So, let me show you how to make a batch in just minutes…
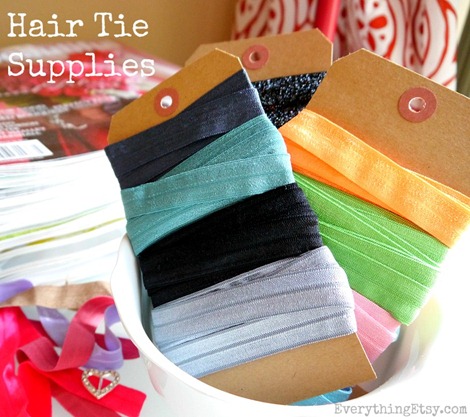
Hair Tie Supplies {Tutorial}

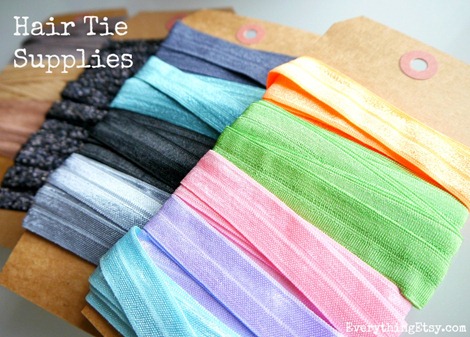
Gather up some pretty supplies.

Hair Tie Supplies {DIY}

I store extra elastic on extra large tags to keep it from getting out of shape.
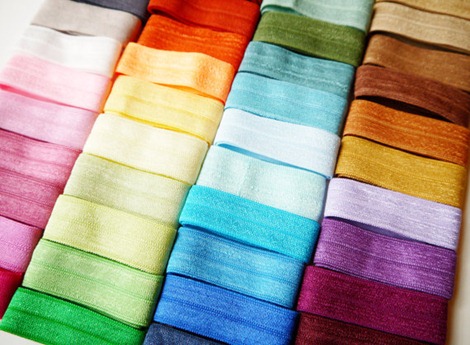
Colorful Elastic

You can find the following supplies at Elastic House.  {This is not a sponsored post. I just thought I’d share this to save you time searching for the right supplies.}

  • 5/8” Fold Over Elastic {50 colors available}
  • 3/8” Black Glitter Elastic
  • Heart Shape Ribbon Sliders {for sparkle}
  • Paper Tags {2 1/4” x 4”} – I make them with my cool little machine!
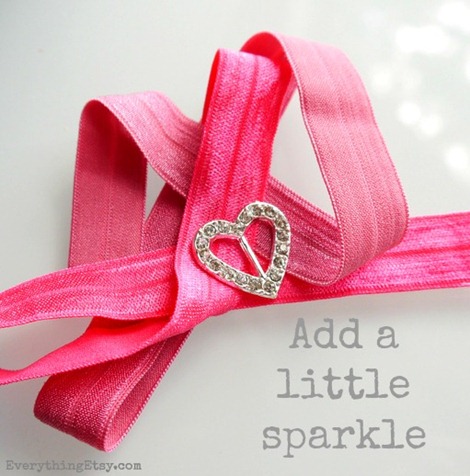
Add a little sparkle

I love, love, love the little heart sliders and need to order more!The Best Hair Ties Ever! {DIY on EverythingEtsy.com}
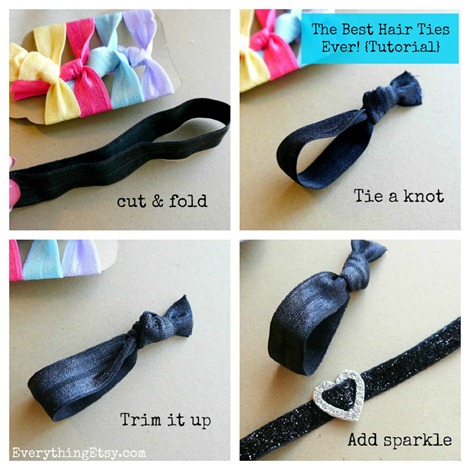
Here’s how you can make these…

Measure about 8 1/2” of elastic.  Fold it in half and while holding both ends together, tie a simple knot.  Do not pull it too tight so you can adjust it later if desired.  Make sure it fits nice on your tag…you don’t want it too tight or it will bend it all up. 

Once you have the right size just trim the end on an angle for a finished look.

To add a little sparkle you can slide a heart shaped slider on before you fold and tie.  Isn’t it beautiful?  Everyone can use a little sparkle!

That’s it…simple & sweet!
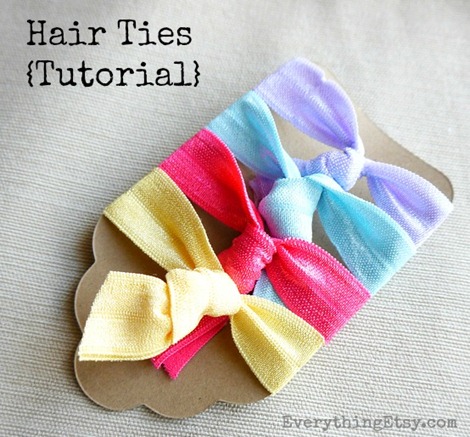
Hair Ties Tutorial

I made some of these for gifts last Christmas.  I wrote “hair ties” on the tag and slid them into a small plastic bag. {I would show photos but the glare off the plastic wasn’t pretty.}
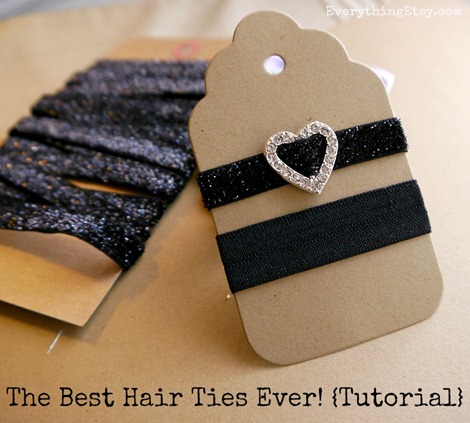
The Best Hair Ties Ever! {Tutorial} on EverythingEtsy

These are simple enough to make all you want.

Pretty enough to wear jogging or for an evening out.

Add a few together for a fun look, or wear them as bracelets!

You will love them!

~Kim

Related posts:

  1. Locket Art {Tutorial}
  2. Make Button Ponytail Holders
  3. Shell Frame Tutorial & Tips {Handmade Gift}
  4. Handmade Silhouette Ornaments Tutorial & Le Papier Studio Giveaway

Filed Under: Tutorials Tagged With: colorful, diy, elastic, hair accessory, hair tie, handmade gifts, how to, ponytail holder, ties, Tutorial

Comments

  1. Monsterscircus says

    February 24, 2013 at 3:01 pm

    Easy peasy and pretty cool! Thanks for sharing, going to make a bunch!!!

    Reply
    • Kim Layton says

      February 25, 2013 at 9:11 am

      Ha…I made a bunch and now I find them in my pockets and in the car. 🙂 At least I don’t worry about not having a way to put my hair up now. 🙂

      Have fun making them!

      ~Kim

      Reply
  2. judy h. says

    February 24, 2013 at 11:16 pm

    Does any one know how long a piece of elastic I would use to make these for a 3-4 yr. old? Thanks!

    These are darling!

    Reply
    • Kim Layton says

      February 25, 2013 at 9:07 am

      Judy,

      I gave some to all different age groups at Christmas. The little ones wore the same size, but their mom just looped it around one more time. It looked beautiful!

      I do make sure to leave the knot loose enough to be untied and made smaller if that’s what they need. If you look close at the knots in the photo of colorful ties above you will see what I mean. Keeping the knot loose also makes them look a little prettier on the gift tag. 🙂

      I hope that helps!

      ~Kim

      Reply
  3. Shelley says

    February 25, 2013 at 12:33 am

    Thank you! I need about a million of these & half the ones I buy are too small. Now I can make all I need, in any color I want 🙂

    Reply
    • Kim Layton says

      February 25, 2013 at 9:03 am

      Shelly, you will love these because you can adjust the length to work perfectly. Enjoy them!

      ~Kim

      Reply
  4. Cyndy says

    February 27, 2013 at 10:35 pm

    These are fantastic! We have a lot of hair in our house and are always in need of decent elastics. Thanks for a quick, useful tutorial!

    Reply
  5. Pauline says

    February 28, 2013 at 12:26 am

    I think these are lovely. Perfect for myself in black and pretty in the rainbow colours for my daughter. I was wondering where you purchased the adorable heart sliders from? I would love to see what is available out there. Thanks for all your great tutorials.

    Reply
  6. onel says

    October 26, 2013 at 11:04 am

    The best hair tie ever! I love how you add the heart slider!!

    Reply
  7. golu dolls says

    August 15, 2018 at 7:28 am

    looking good

    Reply
  8. kanchipuram sarees says

    August 15, 2018 at 7:28 am

    nice post

    Reply
Previous Post Organize Your Ribbon {18 Inspiring Ideas}
Next Post 25 DIY Bridesmaid Gifts

Leave a Comment Cancel reply

Your email address will not be published. Required fields are marked *

This site uses Akismet to reduce spam. Learn how your comment data is processed.

  • Bloglovin
  • Facebook
  • Instagram
  • Pinterest
  • Twitter

Never miss a post:

Enter your email address:

Sell doTERRAEssential Oils How to Start a Blog for Your Etsy Business


follow EverythingEtsy on Pinterest


Disclosure: Various posts and pages on this site include affiliate links. We could earn a referral fee if you make a purchase through those links. Your purchase won't cost you more because you followed our link and we only refer you to sources we can personally recommend.

RSS Now at HandmadeandCraft.com

  • 12 DIY Kitchen Ideas
  • 15 Easter Cupcake Recipes
  • Organize with a Chalkboard Wall Calendar!

RSS Now at KimberlyLayton.com

  • St. Patrick’s Day Crochet Shamrock Pattern & Video Tutorial
  • Printable Coloring Pages for St. Patrick’s Day
  • How to Get Your Business Featured on Blogs

[footer_backtotop]

Copyright © 2025 EverythingEtsy.com · All Rights Reserved · Privacy Policy ·


The term "Etsy" is a registered trademark of Etsy, Inc. - This site is not affiliated w/ Etsy, Inc.
This website uses cookies to improve your experience. We'll assume you're ok with this, but you can opt-out if you wish. Cookie settingsACCEPT
Privacy & Cookies Policy

Privacy Overview

This website uses cookies to improve your experience while you navigate through the website. Out of these cookies, the cookies that are categorized as necessary are stored on your browser as they are essential for the working of basic functionalities of the website. We also use third-party cookies that help us analyze and understand how you use this website. These cookies will be stored in your browser only with your consent. You also have the option to opt-out of these cookies. But opting out of some of these cookies may have an effect on your browsing experience.
Necessary
Always Enabled
Necessary cookies are absolutely essential for the website to function properly. This category only includes cookies that ensures basic functionalities and security features of the website. These cookies do not store any personal information.
Non-necessary
Any cookies that may not be particularly necessary for the website to function and is used specifically to collect user personal data via analytics, ads, other embedded contents are termed as non-necessary cookies. It is mandatory to procure user consent prior to running these cookies on your website.
SAVE & ACCEPT