Have you heard all the wonderful talk about selling your handmade crafts online? You don’t even have to leave your home, pack all your crafts, and sit at a craft show all day to make a sale! Does it sound too good to be true? Am I making it sound easier than it really is? I tell you from experience… it’s easy!
Start your own Etsy shop!!!
I’ll go over setting up and Etsy shop one small step at a time, so you can just follow along. Some computer “how-tos” can sound rather complicated. I’m going to leave out any of the complex computer jargon and explain it to you best I can in what my mom always called “plain English”.
My Plain English Way to Set Up and Etsy Shop
First, let’s start by making some wonderful handmade crafts. If you’re like me, you have tons of craft ideas floating around in your head at once. But, if I make them all my house would be over run with this and that. Not a good plan.
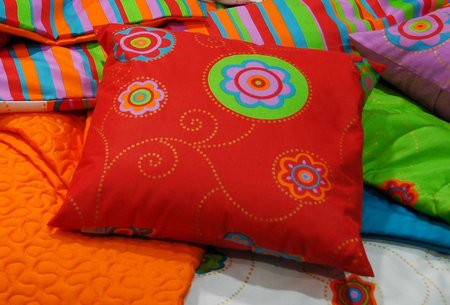
Let’s say you enjoy making pillows and you buy a beautiful yard of fabric on sale. You can make one for yourself and one to sell. How about that? If it doesn’t match your home, but it’s pretty…sell it on Etsy! Someone will love having your handmade pillow on their couch to brag about, and you’ll even be able to pay for your pillow supplies in the process. It’s kinda like feeding a crafting habit!
For more information on what you can sell on Etsy, go here .
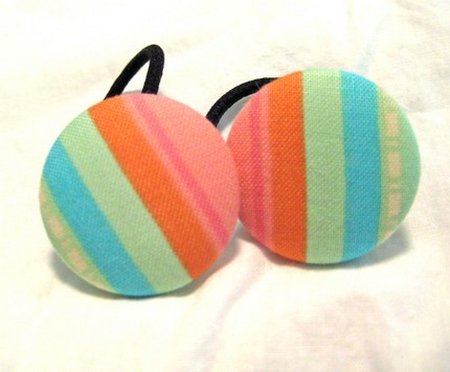
Once you have a few items made go ahead and take some beautiful photos of them. Photos make a big difference on Etsy. Dim, tiny photos of your craft won’t get you sales…trust me, I’ve had them! The lighting needs to be good and a close up is best. Here’s some great Etsy photo tips to get you off to the right start!
Now, all you need is a shop name. There’s a lot to a great name for any business and we have put together some tips and resources for coming up with a name. Check out this post on naming your Etsy shop.
Now for The Computer Stuff
Let’s go on over to Etsy.com to see if your name is available and sign up!
1. Once you’re on the home page, look for “Register” at the top, right-hand corner. Click on it.
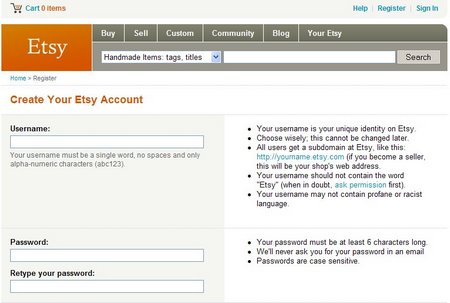
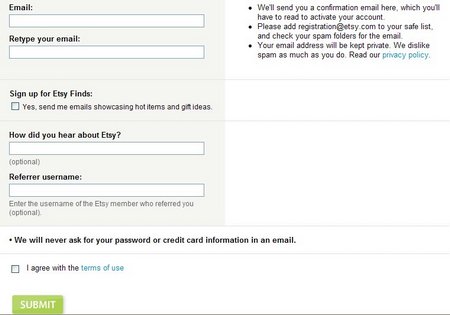
2. Now you should be on the “Create Your Etsy Account” page. Fill in the information and agree to the “terms of use.”
If you are trying to use a name that is taken, it will tell you at this time. Try again. Please note that once you have selected a username, you can’t change it. Your username will be the name of your shop.
3. You should receive a confirmation email with directions to activate your Etsy account. If you don’t receive this email or complete the activation directions they send, you will not have an active account!
4. Now, back on the homepage, click on “Log In”, located in the top, right-hand corner of the page. Enter your username and password.
There you are…you’re starting your Etsy Shop! Isn’t it exciting?
Now let’s list an item to sell!
5. Select “Sell” from the Etsy toolbar located on the homepage. You should find yourself on a page that explains what can be sold on Etsy. Read this carefully. Now click on the green “Get Started” button.
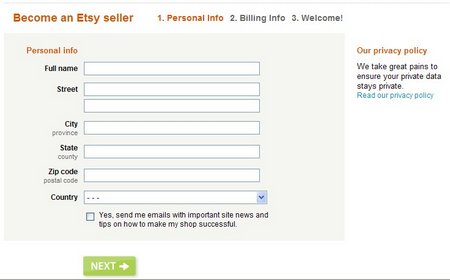
6. Follow the registration process by filling in your personal and billing information. Agree to the terms and check the box. Once this is finished, click on the “Validate Card” button at the bottom. This will direct you to a “Welcome” page.
Congratulations! You’ve finished a big part of the process already! Just keep following me and you will be so thrilled with the end result!
Paypal – You Want to Get Paid, Right?
A few words about Paypal: If you have not opened a PayPal account previously, you should do so now. For protection, most buyers and sellers require a Paypal account to complete a transaction. PayPal is a third-party account that holds payment in escrow.
You can customize your shop!
Once you are signed in, click the “Your Etsy” link at the top of the screen. Then go to the “Shop Setup” section. There are many options, so look around and try a few different things. You might want to start with the Apperance and Shop Policies.
Custom banners are available through Etsy sellers. They are very reasonable, but let’s just start with a basic one for now.
For more information about customizing your shop, click here .
Time to List Your Items!
When you have your shop set up it’s time for you to list your items!
On your home page (after you have signed in) click “My Etsy.” Then you can find “add new item” in the left-hand column. Click to start filling in your information.
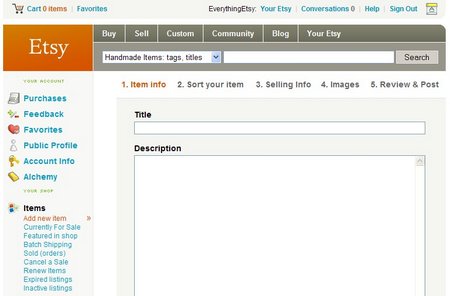
Once you are finished with your “Payment Profile” (You will only do this the first time.) click on “add new item” again. This will bring you to the “Item Information” page.
Title: Be Descriptive! You can us up to 155 characters! Most people don’t take advantage of this.
Description: Use as much space as you need to accurately describe your item.
Materials: Use single words, separated by commas. For example: felt, thread, glue (up to 14 materials)
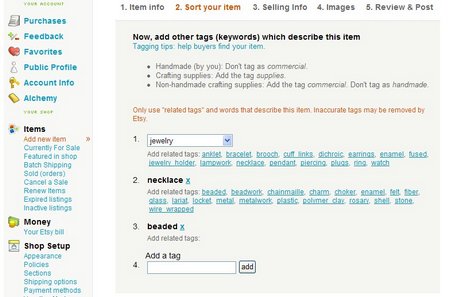
Tags: Tags are keywords that help someone find your item. Choose the first tag in the main category you would like your item listed in. Choose wisely. Then you can add additional subcategory tags up to 14 total. These really help sell your item. If you are unsure of what to choose, maybe you can see what others are using that are selling similar items. You might be surprised at how many tags you can come up with after awhile.
Example: If you have a handmade necklace, you might use tags like these; jewelry, necklace, beads, silver, red, green, jade, women, girl, Etsymom team…..it can go on and on as long as it truely describes your item.
Tags are very important! To read an article on tags click here .
Selling Information : All items are priced in United States Dollars.
Price : Price for listing without shipping charges
Quanity : How many items (exact)
Section: This will put it in a certain section of you shop. You can leave it blank.
Shipping Options: Fill in the shipping information for the item. If you would like to save shipping information to use on another item, go to “Shipping Profile.” Just click “create” and fill in the information and name the profile. You are not required to set up a profile, but it might make the listing process faster in the future.
If you don’t want to offer a combined shipping discounted rate, just enter the same amount as the primary shipping rate in that box.

Images: This is where you will upload your photo for your listing. Click the “browse” button and locate the image on your computer. Then click the “upload” button and you’ll see a thumbnail of the image show up just below.
You can add up to 5 photos per item listing. Once you have uploaded them you can easily change the order that they appear. For tips on uploading images click here .
Review and Post: Review your information and then click “Finish.” If you don’t hit finish all the information will be lost!
You can edit your listing after you click “Finish” so don’t worry if you find a mistake later.
Your listing will appear in your shop located at http://username.etsy.com, in the first category you selected, and in any relevant search results or subcategories.
Your listing will expire in 4 months. That’s a pretty good deal for 20 cents, don’t you think?

Each time you list a new item it will get a little easier for you! And you can work from anywhere!
Now, load up your shop and start making more. Each time you list an item it goes on a “Just Listed” page, so it gets seen right away by tons of people. The more you list, the more they see.
Aren’t you excited? You have your Esty shop up and open for business!
Tips :
-
I find that listing my items in the evening works best for me. You will start to see a pattern in your sales. Try to list during the peak times.
-
I usually contact the buyer as soon as possible thanking them for their order and telling them when I should be able to mail it out.
-
You can offer a discount for a second purchase to keep them coming back.
-
I send a thank you note and a little something extra in their order as a gift. It’s small, but I think they appreciate it.
-
Leave positive feedback for them right away.
-
Always check to make sure a payment has cleared before mailing out their item. Yes, I’ve made this mistake before!
-
I have a Paypal Debit/Credit card that gives me easier access to my money.
-
Mail out your items in secure packaging. No one wants a wonderful item that has been damaged in the mail.
-
Offer a return policy to make your buyer feel more comfortable with purchasing from your shop.
-
Outside light works great for photos and use a plain background.
-
Having a large selection in your shop can keep them shopping.
-
Read, read, read! There’s always more to learn.
Everything Etsy is a great resource for information! Subscribe to receive the latest posts!
Excellent article! Thank you so much!
WOW just what I was searching for. Came here by searching for cubs tickets