I have a slight obsession with homemade bath products. When I see all the fabulous bath bombs at Lush I can’t help but think of how I can make a batch of them myself. I believe I’ve come up with the perfect recipe to turn you into a DIY bath bomb expert in no time flat!
You deserve to enjoy a relaxing bath without spending a ton on a bath bomb…trust me, you won’t know the difference between these and the expensive ones at the mall. Personalize them with your favorite doTerra essential oils. I made these using lavender, lemon and peppermint to help with “seasonal threats” due to pollen {and smell amazing}!

Create a batch of bath bombs and share them with your friends…they’ll love you for it!
These are easy peasy to mix up! Here’s a look at the supplies I used.

This is what you’ll need to make 12-24 bath bombs.
Supplies:
Baking Soda – 2 cups
Citric Acid – 1 cup
Corn Starch – 1 cup
Almond Oil – 3 tsp.
Essential Oils – 1 tsp. total of Peppermint, Lemon and Lavender doTERRA oil
Food Coloring – 8-10 drops
Rubbing Alcohol in a spray bottle
Mini Metal Tart Tins {I LOVE these!}
You can find the exact products I used by clicking on the links above. It might make life a little easier for you! The Citric Acid can be hard to find…and you NEED these tart tins! They are perfect for lots of projects {or tarts}.

- Add Almond Oil and your essential oils to a small container and mix well.
- Add all the dry ingredients to a large bowl and mix well.

- Slowly add the oils to your dry ingredients mixing as you go. Take your time because you don’t want it lumpy. I used a mixture of oils that help with allergy problems…we need it around here!
- Add the food coloring while mixing.
- Spray your mixture 5-10 times while mixing until it resembles the texture of damp sand that sticks together. You might need to spray it a few more times to get it just right.

- Add a heaping amount of your bath bomb mixture to your mold. I’m using a mini tart tin…I love these! You just want to make whatever you use is not too shallow or your bath bomb will break easily.
- Press the mixture into the mold. Add a bit more to the top and press it all over again. This will make a very solid bath bomb.

- Lightly mist the top of your bath bombs with alcohol. I usually only spray one or two times and then press it down again. If you spray too much your bath bomb with start to bubble!
- Let it dry for at least 15 minutes.

- Flip your mold over and lightly tap the mold with your spoon. This will usually cause the bath bomb to pop right out, so be ready.
- Mist the top of your bath bomb with alcohol.
- Let it dry overnight.

That’s it! Now you know how to make amazing bath bombs!
Get creative with your bath bombs by mixing essential oils to create the perfect scent to match your mood. I use doTERRA essential oils which I now sell after using them for years! A little goes a long way when you use high quality oil and the health benefits are a bonus!
The possibilities are endless and once you start making them you’ll come up with a ton of new ideas to try. Make extra and save them for birthdays and holidays. This is one of those handmade gifts that everyone loves…trust me!
Have fun!
~Kim
Love DIY bath products?? Check out this easy homemade bath salt tutorial!

These look beautiful, Kim! I am always lusting over the latest Lush catalog, and have been looking for a good source of essential oils for the past few weeks – this post couldn’t have come at a better time! Does the alcohol serve a specific purpose in this recipe, or could water be substituted instead?
Thank you!
You brought up an excellent point that I should have mentioned. You can use water instead of the alcohol. I haven’t tried water, but when I researched it I found some comments about water making it react faster {start bubbling} while you are working with it. I also live in Florida with high humidity and I thought the alcohol would dry faster. So far I have loved it! I feel like it really helps to make the outside surface area of the bath bomb a bit harder so it doesn’t crumble. Water might do the same…if you try it please let me know.
Just make sure whatever you use the mixture is like damp sand before you start working with it. 🙂
Please email me at Kim@everythingetsy.com with any of your oil questions. I LOVE to talk about them, and I can help you pick just the right ones for you. 🙂
~Kim
Hi. What can u wrap them with to keep them mois t. I want to sell them at a craft fair on Nov 26th. How much woild u sell them for.
Hi there!
If you want to avoid using alcohol, another great option is witch hazel 🙂 Personally, I would avoid using water because it’s really easy to set off the fizzing! Another option is to add a bit of skin loving oil to bath bombs (like joboba, chia seed, argan) to help moisten them.
-Amanda
this sounds like a great recipe and I will try it. But I do have one question: Once made, how long can I store them, without loosing the great smell?
Thank you!
So I tried making these today and I thought they turned out great except a couple hours after I took them out of the mold and spritzed them with alcohol, they started to expand….. I went from having bath bombs that were lovely and the same shape as the ones in your pictures to weird looking mounds! I’ve been struggling with them all day! I think I might have used too much alcohol but even after I reshaped them, they still expanded and flattened out even more. I put them back in the silicone molds to dry overnight but I fear that they are going to be really crumbly): but now I know for next time! Got to be careful with the alcohol!
how long will these store in an airtight container??
I am wondering if you could use silicone molds instead of tin or will that react with the citric acid.
I use silicone molds when I make these and there is NO problems whatsoever! enjoy!
Can you use olive oil instead of almond oil?
What a fantastic idea! we’ve included it in our Thrifty Handmade Christmas Gift Ideas, check it out here…
http://www.consollo.com/blog/thrifty-handmade-christmas-gift-ideas/
I am curious…I just made these, do you have to wait overnight to use them or can you just let them harden for the 15 minutes and use them?
Hi Meghan! Awesome! I would wait overnight for them to dry. You can actually use them now, but they won’t be at their best. {But, I did do it when I made them. :)} Enjoy!
~Kim
So If you make these with food coloring will it die your skin whatever color you die your bath bomb?
I have tried to make bath bombs twice now and each time they start expanding. What am I doing wrong?
Hi Carol! Use less liquid. The amount needed can vary based on the humidity, so start with half and add to it as need to make it stick together. Be careful not to spray it too much at the end. Hope that helps!
~Kim
Hi, I am definitely making these for Christmas! I was just wondering though, do you know if you can substitute Epsom salts for corn starch in this recipe? It just seems like it would be so nice in the bath 🙂
I don’t have any almond oil. Would mineral or baby oil work as a substitute?
I used olive oil. Can also use coconut oil.
Quick question, I saw another ask it but I didn’t see any reply- can I use silicone tart molds instead? I’ve already got those on hand 🙂
You can, but be ready to have some of them crack and crumble. I’ve found that since the tart pans are so solid you can pack your bath bomb in there much better. So, try it and see. You can always use any broken bath bombs for yourself…lol!
~Kim
Hey!
great recipe 🙂 We’re doing projects at school and are definitely trying this. But how many bath bombs will we have with the amounts in the recipe?
Thanks!
Samanthiara
I just made these. I used mini donut pans, I’m so excited to see how they turn out.
Hi Kim! Do you know if the food coloring causes problems with dyeing skin or the tub?
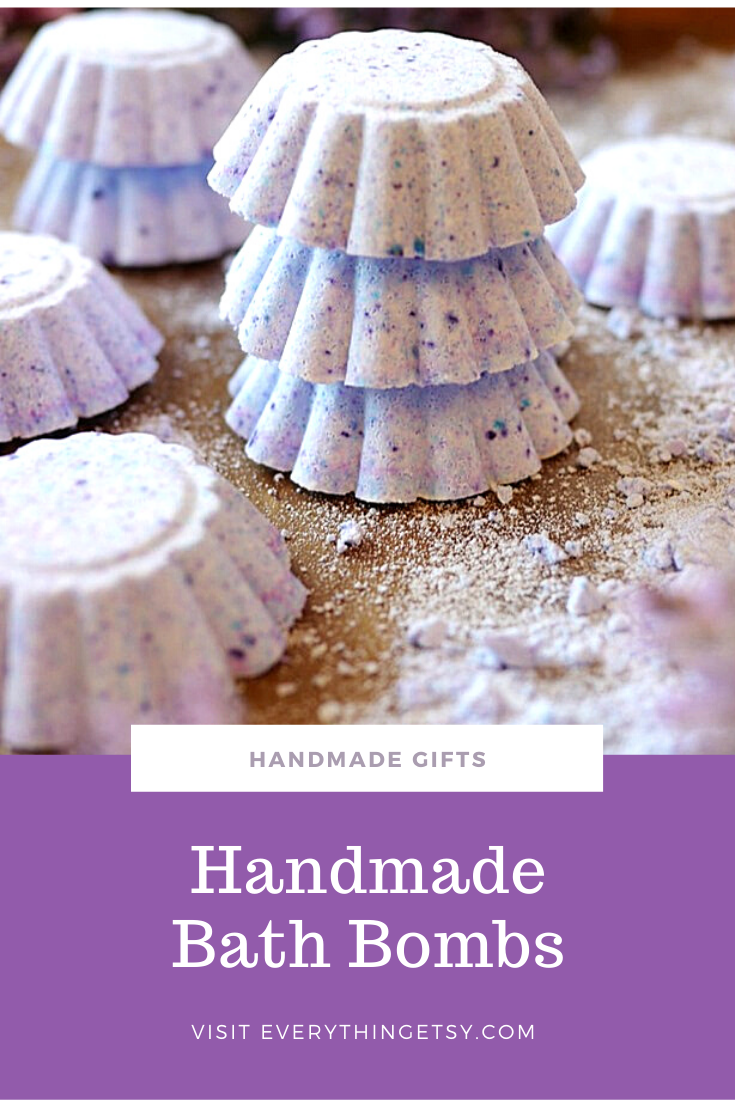
And this is a completely “form-over-function” question, but how did you make the neat variations in the colors (the little darker specs of purple and blue) in there? I haven’t seen that in any of the bath bomb recipes I’ve looked at so far other than this one.
Also been wondering the same thing about the color specks
Hi Kim,
After looking at your post a year ago we finally started our own bath bomb business. Thanks for the inspiration and tips!
I will try to do here at home.
I’m going to make these for Christmas gifts and was just wondering if on the rubbing alcohol it matters what percentage you use? 50%, 80%, 90%, etc? Can’t wait to try them!
Hello, i think that i saw yoս visited mу site so i came tо
go baсk tɦe favor?.I am attempting tο tߋ find issues to
enhance my website!I suppose іts good enough
to use a few of үour concepts!!
Alright, I waited overnight as these were not ready to un-mold after 15 minutes but these still 100% did not work after 12 hours 🙁
mine all puffed up and I kept smooshing them back into the silicone molds but this morning they are still wet and a mess.
*Can I save these, crumble back into a new batch & NOT use the alcohol spritz this time?? What do y’all think? I hate to waste…looking for others ideas ~ THANKS!
Sorry, but once they get too wet you really can go back. I would do it again without using alcohol at all. If they seem really solid you can do without it. I just like the way they finish mine. I live in Florida and I know very humid days can make a huge difference. If it’s humid out you can cut all liquid down a bit and then add it if it’s not sticking together like sand at the beach. Don’t give up! I’ve made these several times.
~Kim
Hello!
So I followed this recipe down to the smallest detail. I let my bombs sit for over 16 hours and i picked one up this morning and it immediately crumbled. What did I do that caused them not to harden? I sprayed the alcohol and the outside layer was solid but the rest of it isn’t.
Next time add just a bit more liquid. It needs to be like damp beach sand when you press it into the mold. 🙂
You’ve got this!
~Kim
Many thanks for this information. I’ve shared it on my own Twitter
account. Hopefully, a few of my friends and family will pay you a visit ….
not personally 🙂