• Tutorials
  • Ikea Hacks
  • Free Printables
  • Holiday
  • Handmade Gifts
  • Etsy Business

EverythingEtsy.com

Etsy Blog | Selling on Etsy | Etsy Banners | Giveaways & Creative Stuff

You are here: Home / Tutorials / Patriotic Clothespin Wreath Tutorial

Patriotic Clothespin Wreath Tutorial

By Kim Layton 14 Comments

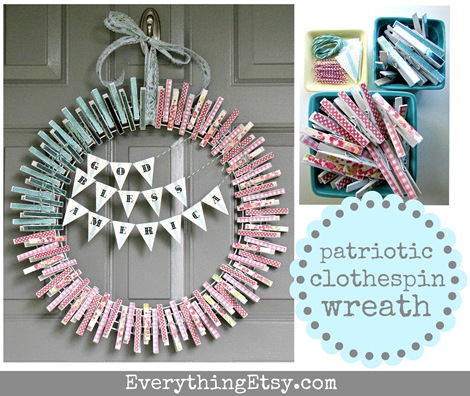
The summer heat is on and it’s time to add your own spark with a sweet patriotic clothespin wreath!

I have a project I am sooooo excited to share with you guys today!

I’m head. over. heels. in. love. with how this turned out…i can’t even take it 🙂

i’ve been lovin’ on the clothespin wreaths I’ve seen around blog land

and wanted to try my hand at one just in time for the 4th!

come on…let’s make this together ♥ really, it’ll be fun
just a few things wreath

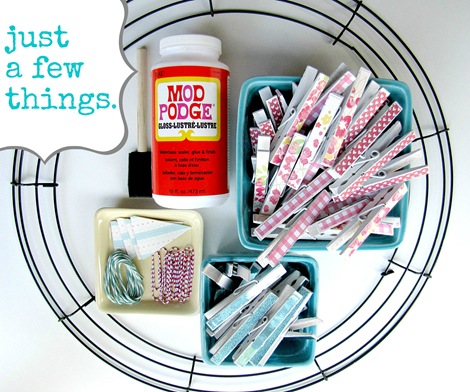
this is such a basic project, there’s not many instructions

and the few supplies needed are easily found at any craft/home improvement store

Supplies:

1. clothespins (used 89)

(I found my clothespins at Walmart for $1.88 for 100 count…super cheap)

2. wire wreath form

(mine measured 18in. from top to bottom)

3. Mod Podge

4. scrapbook paper

5. twine, paper buntings and other trinkets that makes you happy ♥

6. spray paint (not pictured)

this is optional if you desire an other-than natural wood color for your clothespins

If you’re going to spray paint  them…go ahead now…

then you can cut your paper during drying time 🙂
decorate

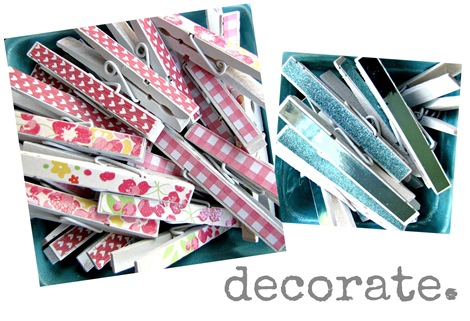
~ decorate ~

i simply cut strips of paper that would fit on the flat part of the pin then used Mod Podge to glue is down…easy right?

the paper that’s pictured is from 2 different mat stacks from Joanns, this one & this one

used blue paper on 24 to form the “star” portion of the wreath, pink and red on 65 for the “stripes”

but you can use any paper/color scheme that you like 🙂
clip

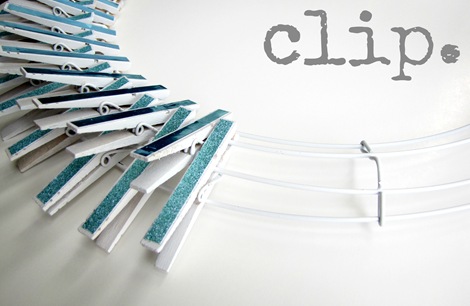
~ clip ~

arrange the clothespins on different tiers of the wreath for a fuller look

starting with the blue, fill one quarter of the wire form

fill the rest with the red/pink
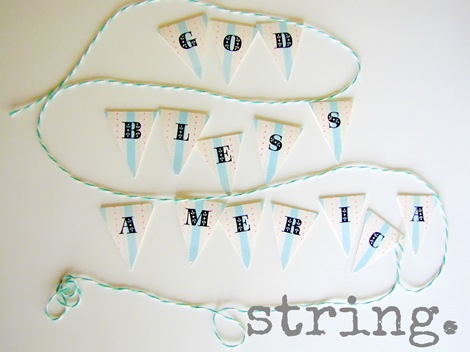
string

~ string ~

make a bunting from paper cut into long rectangles, folded in half, then trimmed to a triangle shape…use rub-on letters or stickers

thread twine through …i taped the twine to the inside of the triangles to keep them from shifting

(i didn’t end up using those cute stripey paper clips that were in the picture above, sniff )

wrap the ends of your bunting around the clothespins however

you’d like to see them drape

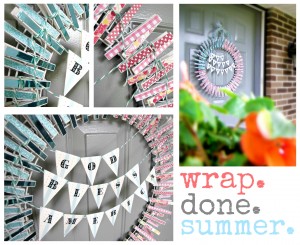
~ wrap.done.summer ~

all done!

isn’t it too cute for cuteness?!

add some ribbon or hang it without…on your front door or even somewhere inside…lovely!

Happy Stars & Stripes!

much loves ♥

Jaime

Hi I'm Jaime photo new My name is Jaime from Raising up Rubies ♥ stay at home mama to 2 girls and wife to a handsome hubby

…my love is for all things crafty and i feel so blessed to have a super cute space to play & create in…


She’s a super talented contributor to Everything Etsy!  You can find out more about Jaime on her blog…Raising Up Rubies.

Have you made anything to decorate your door for the summer?
Related posts:

  1. Make Fabric Covered Buttons {Tutorial}
  2. 25 DIY Anthro Inspired Knock-Offs
  3. DIY Lavender Ideas {6 of My Favorites}
  4. 7 Spring Sewing Tutorials

Filed Under: Tutorials, Uncategorized Tagged With: clothespins, diy, fourth of July, patriotic wreath, summer wreath, Tutorial

Comments

  1. brooke adkins says

    June 13, 2012 at 8:43 am

    I love this!

    Reply
  2. Michele @ The Scrap Shoppe says

    June 13, 2012 at 11:09 am

    This is SO cute!!! I absolutely adore this clothespin wreath! 🙂

    Reply
  3. Michelle says

    June 13, 2012 at 2:45 pm

    I LOVE this – thanks for showing!

    Reply
  4. Jaime ♥ Raising up Rubies says

    June 13, 2012 at 4:37 pm

    thanks girls! I’m so glad you like it ♥ it just makes me all happy inside 🙂

    Reply
  5. Tricia says

    June 14, 2012 at 12:05 pm

    Being a MAJOR fan of the clothes pin
    {https://www.etsy.com/listing/89549233/table-number-holder-clothes-pin-on-a}

    I especially love this tutorial. How cute. I must pin it now.

    Reply
  6. Carol Cook says

    June 16, 2012 at 1:06 am

    The wreathe is too cute!

    Reply
  7. Sam Z says

    June 22, 2012 at 10:53 pm

    Super cute! Thanks for sharing – I can’t wait to make it! 🙂

    Reply
  8. Mod Podge Amy says

    June 29, 2012 at 12:03 am

    So fun Kim – love it!!

    Reply
  9. Desiree says

    June 29, 2012 at 2:46 am

    Oh my goodness! I really love this!

    Reply
  10. Lisa Pirtle-Reminger says

    June 30, 2012 at 1:24 pm

    This is so adorable I love when bloggers share their wonderful creativity! Thanks!!

    Reply
  11. natashalh says

    May 30, 2013 at 8:18 am

    I just wanted to let you know I included your wreath on a summer tutorial round up post today on my blog! It is super cool and I love Mod Podging clothespins.

    http://www.natashalh.com/summer-tutorial-round-up-mod-podge-felt-and-more/

    Reply
  12. mary jo says

    May 26, 2014 at 10:00 am

    Loved your tutorial..im gonna make one today….thanks

    Reply
  13. golu dolls says

    August 15, 2018 at 8:49 am

    looking good

    Reply
  14. kanchipuram sarees says

    August 15, 2018 at 8:50 am

    nice post

    Reply
Previous Post Father’s Day Printables on Etsy
Next Post Summer Road Trip {Etsy Finds}

Leave a Comment Cancel reply

Your email address will not be published. Required fields are marked *

This site uses Akismet to reduce spam. Learn how your comment data is processed.

  • Bloglovin
  • Facebook
  • Instagram
  • Pinterest
  • Twitter

Never miss a post:

Enter your email address:

Sell doTERRAEssential Oils How to Start a Blog for Your Etsy Business


follow EverythingEtsy on Pinterest


Disclosure: Various posts and pages on this site include affiliate links. We could earn a referral fee if you make a purchase through those links. Your purchase won't cost you more because you followed our link and we only refer you to sources we can personally recommend.

RSS Now at HandmadeandCraft.com

  • 12 DIY Kitchen Ideas
  • 15 Easter Cupcake Recipes
  • Organize with a Chalkboard Wall Calendar!

RSS Now at KimberlyLayton.com

  • St. Patrick’s Day Crochet Shamrock Pattern & Video Tutorial
  • Printable Coloring Pages for St. Patrick’s Day
  • How to Get Your Business Featured on Blogs

[footer_backtotop]

Copyright © 2025 EverythingEtsy.com · All Rights Reserved · Privacy Policy ·


The term "Etsy" is a registered trademark of Etsy, Inc. - This site is not affiliated w/ Etsy, Inc.
This website uses cookies to improve your experience. We'll assume you're ok with this, but you can opt-out if you wish. Cookie settingsACCEPT
Privacy & Cookies Policy

Privacy Overview

This website uses cookies to improve your experience while you navigate through the website. Out of these cookies, the cookies that are categorized as necessary are stored on your browser as they are essential for the working of basic functionalities of the website. We also use third-party cookies that help us analyze and understand how you use this website. These cookies will be stored in your browser only with your consent. You also have the option to opt-out of these cookies. But opting out of some of these cookies may have an effect on your browsing experience.
Necessary
Always Enabled
Necessary cookies are absolutely essential for the website to function properly. This category only includes cookies that ensures basic functionalities and security features of the website. These cookies do not store any personal information.
Non-necessary
Any cookies that may not be particularly necessary for the website to function and is used specifically to collect user personal data via analytics, ads, other embedded contents are termed as non-necessary cookies. It is mandatory to procure user consent prior to running these cookies on your website.
SAVE & ACCEPT