This post is a little on the techy side – if it helps you, great! If it bores you to tears, blame Tim (he wrote it)! ~ Kim
If you’re an Etsy Seller with a self-hosted WordPress blog, then you might be interested in a neat new plugin for displaying your Etsy shop items in your blog sidebar.
I’ve been playing around with the Customizable Etsy Widget plugin to see just how customizable it is and I’ve taken a few screenshots along the way to show you what I’ve done and how you can do the same thing on your WordPress blog.
The Problem With Etsy Mini’s
Is that they all look the same. That’s why the CraftCult Widget is so popular. It’s great if you like one of the available options. But what if you’re all into the exact colors matching? What if you’re totally neurotic about using your logo in everything you do? What if you’re just a control freak. (not that I would know anything about any of these)
For whatever reason, you may want to be able to automatically display your Etsy products on your blog or WordPress website and have it look exactly the way you want it to. Then this is the widget for you.
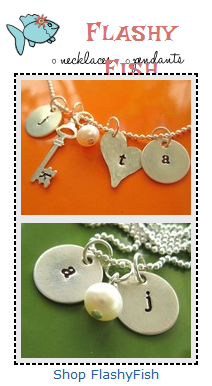
You can see the current rendition of the “test dummy” widget I’ve been working on for this post to the right. It’s also live at the bottom of the right sidebar here at EverythingEtsy.com. Just scroll down the page to see it.
I’m not totally satisfied with this. I don’t love the black border or the grey background, but I ran out of time! The beauty of something like this is that once you know how and where to do the customizations, you can change any time you like with ease.
At the risk of getting way too technical for this blog, I’m going to explain the steps involved in what I’ve done.
Step One: Install the Plugin
Installing plugins in WordPress couldn’t be any easier.
- In the WordPress Dashboard, look to the left side and find “Plugins”
- If you need to, click the little dropdown arrow to expose the options, click “Add New”
- In the box on the next page, type in “Customizable Etsy Widget” and hit search.
- On the following page, you should see something like this:
 Since you haven’t installed the plugin yet, you’ll be able to click “install now”.
- Then just go through the next couple of screens until you have activated the plugin.
- That’s it – plugin is installed
A word of advice: whenever you install a plugin, check your website before continuing to make sure you didn’t just break it. Rarely, a plugin will conflict with some other aspect of your site set-up and things won’t work. If that happens you usually just delete the plugin you just installed and go back to life without it!
Step Two: Install A New Widget
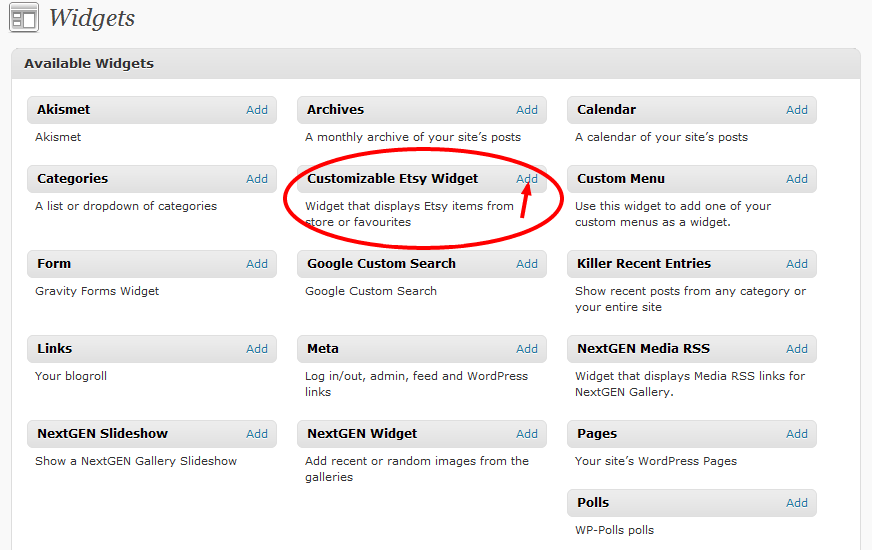
This plugin creates a new “widget” available in your WordPress Widget’s panel. You reach that by looking on the left side of the WordPress Dashboard for the section titled “Appearance” and the choice under that called “widgets”. When you click on that, you see a screen like this:
Click to add the Customizable Etsy Widget. (it’s possible your screen will look slightly different. I have the drag-and-drop widget arrangements disabled. You may be able to just click and drag the widget into the sidebar where you want it)
Once you’ve placed the widget in a sidebar, you can adjust a few settings:
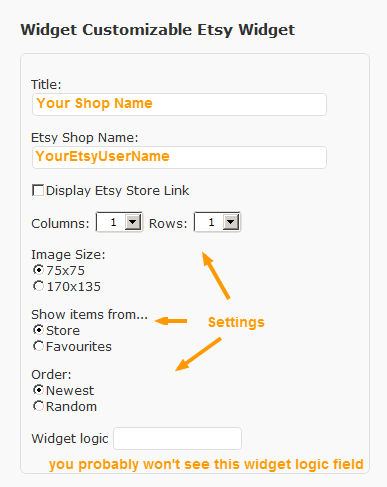 That’s it for the initial set-up. Once you save the widget, it should be live on your site. When you check it, it will be there, but look plain!
This is where the really techy stuff starts….
If you have experience with CSS (Customizable Style Sheets) then this will be nothing new to you. If you don’t, this might be a good item to start with.
Step Three: Modify the CSS
Before you can get started with modifying the CSS coding for this widget, you need to know which file to modify. With many themes, you can follow this path to find the right place… Dashboard > Appearance > Editor >Select Theme to Edit (top right) > Styles > style.css
Then you can go about the process of figuring out which CSS Elements you want to change. For this tutorial, I used the “inspect element” feature in Google Chrome, which is reached by right clicking over an object when using the Chrome browser.
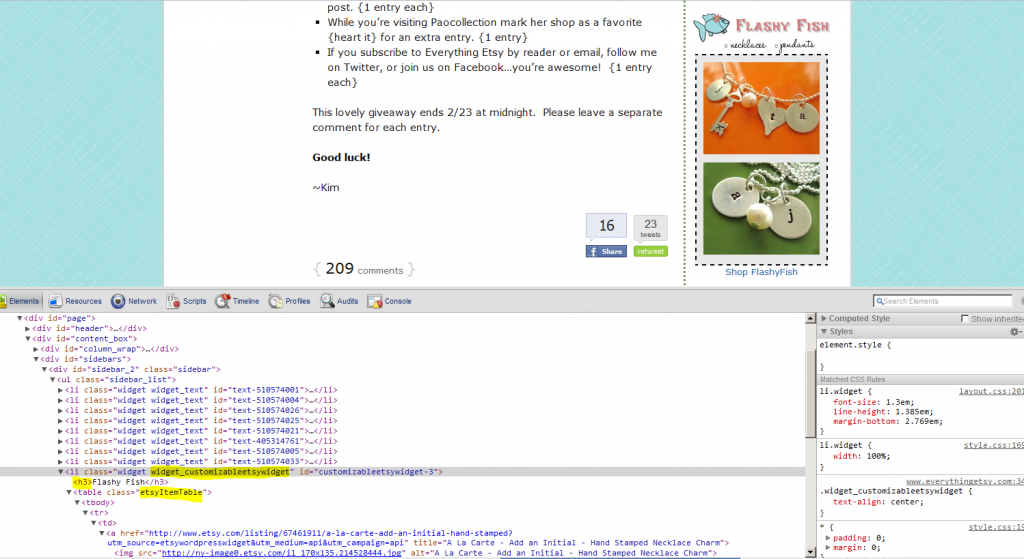
If you enlarge the photo above, which you can do by clicking on it, you’ll see that I’ve highlighted the CSS elements we want to change.
I want to change the font of the Shop Title, and add a background image behind it.
Here is the CSS code related to the shop title:
/*Customizable Etsy Widget Customization*/

.widget_customizableetsywidget h3{
font-family: 'Irish Growler', serif;
font-size:19pt;
text-shadow: 2px 2px 2px #aaa;
color: #D57373;
background: url(/images/widgetheaderbackground.png) no-repeat;
height: 60px;
margin-bottom: 0;
padding-left: 45px;
text-align:right;}
The first line: .widget_customizableetsywidget h3 tells the browser that we’re only modifying the Etsy Widget and of that, only the H3 (heading three) portion.
After that we include a font from the Google Font Directory. There are some extra steps involved in this which are explained at the Google site.
Following the font options, we include a custom background image behind the title and set the height of the area large enough so that the whole image displays (60px). We override the default white space below the image with margin-bottom: 0;
Finally, we make sure that the words don’t appear on-top of the fish in the background image using padding-left: 45px; and text-align:right;.
Then we modify the lower portion of the widget surrounding the pictures using the following bit of code:
.etsyItemTable {
margin: 0 auto;
background: #e9e9e9;
border: 2px dashed black;
padding: 5px 5px;
}
In the future, I’ll modify this further with a background image and some customizations around the pictures themselves by adding some rules to .etsyItemTable img
Watch Out For Internet Explorer Issues
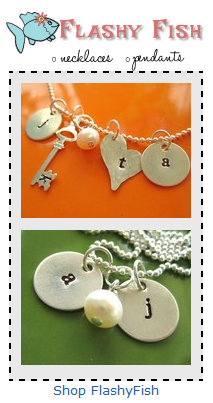
When you’re making design changes like this, you want to be sure they work in all browsers. When I first thought I was done, I looked in Internet Explorer and this is what I saw.
I had to go back into the CSS and play around with the font size to get it to fit on one line without going over the fish.
You’ll also notice that in Internet Explorer, the dashed line is different and there is no shadow around the letters as there is in the other pictures. It all depends on which version and which browser, but it’s good to check your customizations in a few when you finish.
Infinite Options
This is just a quick example of the basic customizations available to you using this Widget and CSS.
If you’re still reading, and thinking… “I really need a WordPress blog to help promote my Etsy Shop“, we can actually help you with that! The company that Kim and I run together, Crazy Tree Media, can register your domain name, provide hosting, and set-up your WordPress installation for you.
WordPress sites are really incredibly powerful and plugins like the Customizable Etsy Widget are just an example of why we love WordPress.
I have a brand new WordPress blog (its just a week and a half old little baby right now, lol) and am hoping to soon open an Etsy shop, so this is such a great tool to learn about… Thanks for sharing!
Another thing to remember, is that this will work on WordPress.org blogs, but if you have a free blog on WordPress.com, you can’t use plug-ins.
Thanks for the easy (well, as easy as tech-y stuff can be!) explanation on how to set this up! You rock my socks 🙂
@Meagan – Good point on the WordPress.com! I’ve gone back in and added “self-hosted WordPress blog” at the beginning of the post. Hope that avoids confusion.
You’ll love your new blog and we wish you the best success on Etsy!
Great post, Tim. I will use this info in the future. Much appreciated.
Sondra
This is amazing work Tim! This is one more reason for me to be jealous of wordpress bloggers!
Just another reason for me to make the switch from wordpress.com to wordpress.org!!! Thanks for sharing 🙂
All the great stuff is avialble for the wordpress.org and not .com….how come WordPress?
Hi folks,
I’m new to WordPress. I think I have successfully activated the etsy widget but my site says “no items listed”. I’ve missed something, but I don’t know what. Can you help?
Thanks!
Very useful, thanks!
Hi Kim, this is a great post.
I have figured how to change the image size, but these come out very blurry. Do you know how to get it with a clean look.
I am using self hosted wordpress.
Rgds
TZ
I do like the ease of the ‘Craft Cult’ Etsy gadget but I’m frustrated with the mandatory branding graphics. Is there any possible code for this Word Press widget that can be used on a regular website or on “Blogger” blogs?
.-= Heather G´s last blog ..Small Crossbody Bag: Red and Blue Flourish =-.
Back again- I forgot to check follow-up by email button !
Hi! I am new to blogging and have a self hosted WordPress.org site that I am now trying to customize. Thank you for your clear instructions. For a newbie it makes customizing less scary!
Cheers,
Louise
Thank you for this info, it was really helpful! I now have my widget up and running, though it’s really plain right now as I have some CSS learning to do! But to me plain is better than a cheesy pre-made template anyway 😉
I just added this widget. I came over here to find what I needed. I knew you would know!
Thank you! I have been working on putting up a site for hours now and my brain was about to shut off and I was about to give up when I found your help. (I had my info entered incorrectly until I saw this.)
Thanks!
Vaike
Thanks for the great tips. I plan to expand into an Etsy shop in the future and was looking to find an easy widget to install on my WordPress.org site!
Thank you so much for this tutorial!
The only thing I haven’t managed to do is change the default black border around the thumbnails to white. Could you tell me how please? Thank you!!
looking good
nice post