Guest Tutorial by Janet Metzger of The Empty Nest
For those of you out there who are afraid of zippers, I feel your pain. A few months ago I too would start to shake when I even thought of sewing a zippered pouch or bag. They just scared the bajeebers out of me.
I finally decided enough is enough…I was going to conquer my fear of zippers. I watched a few YouTube tutorials and took a leap of faith. Now I am creating dozens a day!
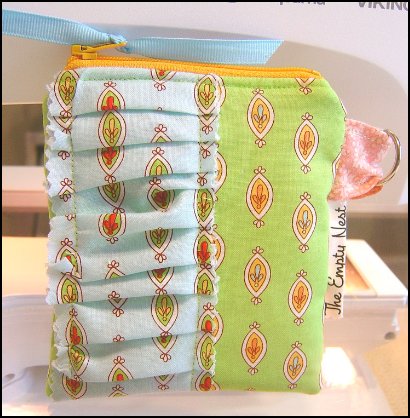
I no longer fear zippers and you will be cured also. I will walk you through the creation of a pretty ruffled coin purse.
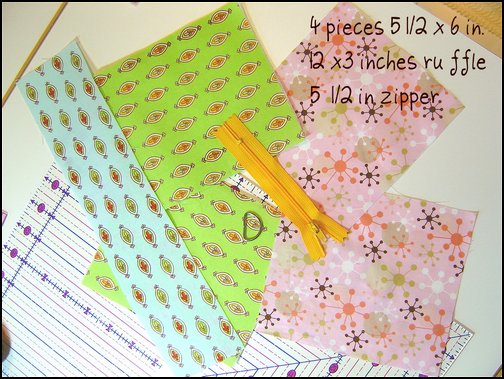
1. you will need to cut 4 pieces of 5 1/2 x 6 inch fabric (2 ext & 2 lining) 2 pieces iron on interfacing
2. one 12 x 3 inch piece of ruffle fabric (I pink the edges)
3. 5 1/2 inch nylon zipper
4. zipper foot for machine
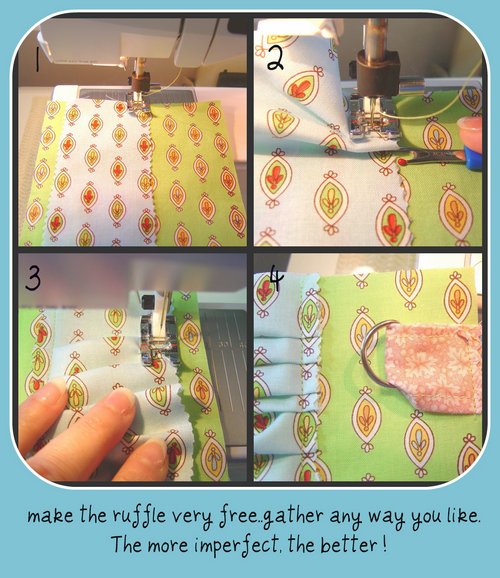
Lay the ruffle strip as shown in photo 1. As you sew, begin to make gentle gathers as in photo 2. They do not need to be even. The more rustic the better.
Flip the piece over and sew down the opposite ruffled side. I sometimes add a metal key ring as shown, but that is optional.
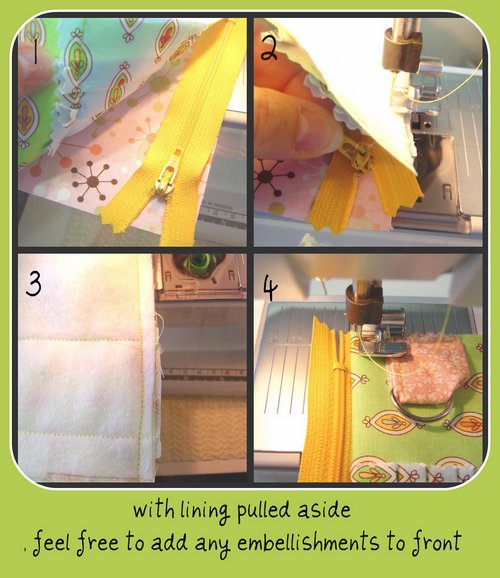
Now to attach the zipper to one side we are going to make a kind of zipper sandwich. Keeping in mind how you want your pouch to open..rt to lft or vice versa, lay your zipper between the exterior piece and the lining as in photo 1 and 2. Pin in place.
When you get to the zipper pull, you will not be able to sew past it, with needle in down position, you need to carefully tug the zipper down past the zipper foot. Once out the way you can proceed to sew as before.
Photo 3 shows the stitching along the zipper. Flip the lining over and topstitch as shown in photo 4. This topstitching makes for a prettier and more finished look to your pouch.
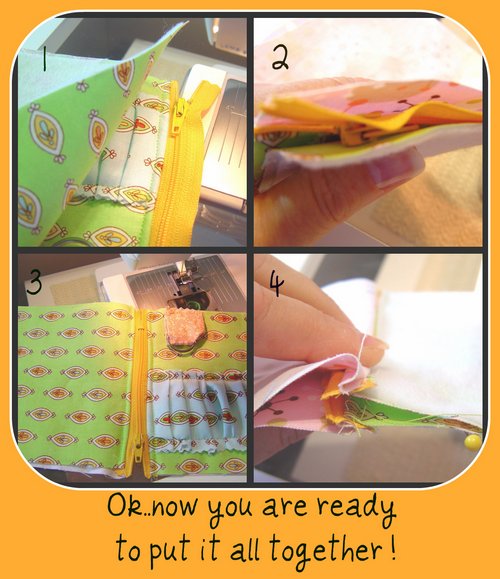
To attach the other side of your pouch we will need to make another zipper sandwich as in photo 1 and 2.
Sew down along the zipper as before moving past the zipper pull in the same manner with the needle in the down position.
Photo 3 shows both of the sides top stitched nicely.
Ok…now you need to sew the whole pouch together. You are almost there! Can you feel the fear melting away??
Pin the right sides of the exterior together and the same with the lining pieces. The zipper needs to be at least 3/4 of the way unzipped and facing the lining as shown in my photo. It is important to leave the zipper unzipped so you can turn your pouch right side out.
I like to begin sewing just above the zipper on the right. Go slow…only you know your machine and how hardy it is. You may need to walk it over the zipper or if your machine is like mine, I sew right over with no problem. Nylon zips are easy to sew over…not so with metal ones. That’s a different tute!
I always sew back and forth a couple of times to make sure of a good connection at the zipper.
Then just proceed to sew about a 1/4 inch seam allowance all around to the other side and sew over the zipper edge the same as before. Always being aware of where the metal parts of the zipper are..they will break your needle.
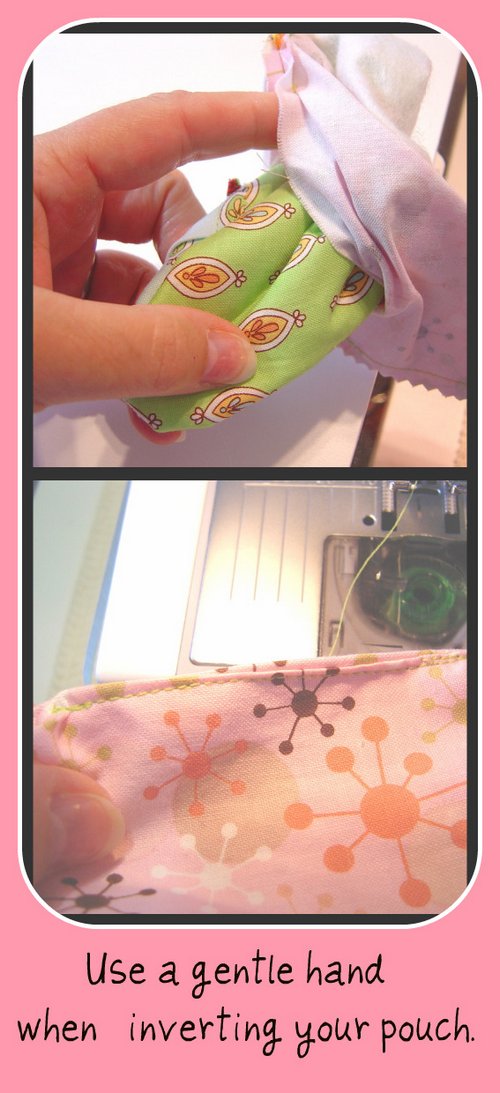
On the lining you will leave a 3 inch gap unsewn. This is where you will invert your pouch. I know many ladies leave the opening at the bottom, but I don’t like to look down into a pouch only to see the stitches where you have sewn up the opening. Having it on the side is a cleaner look.
Carefully reach inside and grab a corner and pull it through your side opening. Invert the whole bag and use a pencil to sharpen up the corners. Be sure to use your finger to poke up the zipper corners to give a nice clean zipper edge.
Sew up the side opening and push the lining down into the pouch, making it as smooth as possible.
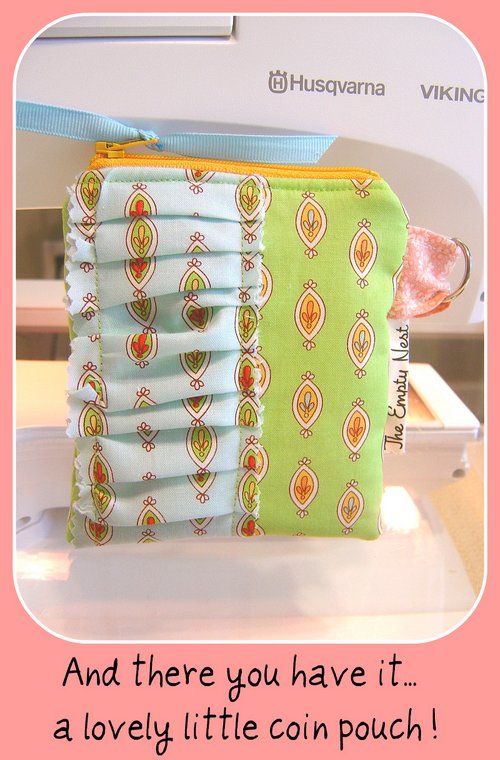
Now tie a pretty piece of ribbon onto your zipper pull and you are all finished!
Wasn’t that fun and easy? Practice making a few and you will be an expert in no time. Most of all have fun, relax and enjoy the process.
Next time a friend admires your coin pouch you can say, “I made it!”
Of course if you prefer, you can always buy them in my Etsy shop 😉
——
Thanks Janet…what a great tutorial!
I’ve always been nervous when a pattern calls for a zipper! So nervous that I have my mom come over and help me with it! Ha!
Do you have a fear of zippers??
~Kim
I am scared silly of zippers in pouches or bags…but now I am going to try with this step by step info I know I can do them!
Ok! Ok! Ok! I to, am afraid of a zipper. You have given the inspiration to get busy and learn to put one in. Im going to make this with your tutorial and maybe I will be putting in zippers before you know it. Thanks for the tutorial and confession.
.-= Tammy/ StitchnStudio´s last blog ..Pink Satin and pearl haircomb =-.
I totally feel the fear. Or at least I did. I used to call my mama whenever I wanted to make a zipper bag because I didn’t want to have to rip all of those darn seams out but now, I am a much more confident zipper girl. It required lots of practice but now I search out nifty colors of zippers for my zipper bags. 🙂
Great tutorial.
.-= Jen´s last blog ..Bohemian Bouquet Tapestry =-.
Thanks so much I have avoided zippers forever but this looks so easy that I am going to give it a try this weekend. Thanks again.
FEAR CONQUERED! and it really wasn’t that difficult! GREAT tutorial. thank you 🙂
This is so pretty!!!! worth a try! thanks for sharing.
.-= Ash- StyleHerForever´s last blog ..Look-1 Red Hot Ruffles =-.