Great lighting can make your products look amazing!
It’s no secret that product photos can make or break your Etsy sales. You can have the coolest handmade product ever, but without an outstanding photo you might not be as happy with your response.
Getting beautiful photos is not as hard as you think, but it will take a little practice to get the hang of what makes your product stand out in the crowd.
Lighting is the biggest source of photo problems. Create your own photo light box and you’ll be amazed at the quality photos you can take!
Here are 5 examples of DIY Light Boxes…
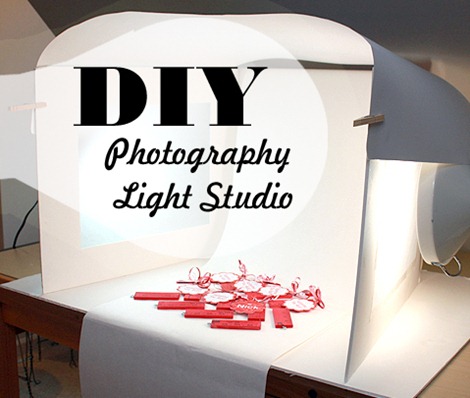
Pretty Handy Girl – DIY Photography Light Studio Set Up
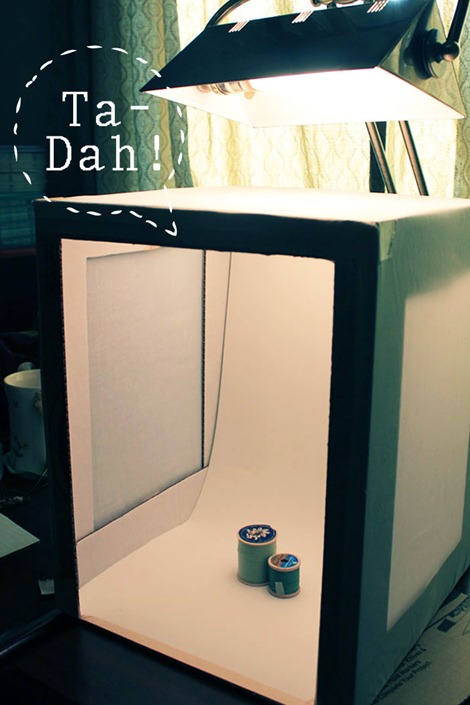
Ninth and Bird – DIY Photo Light Box
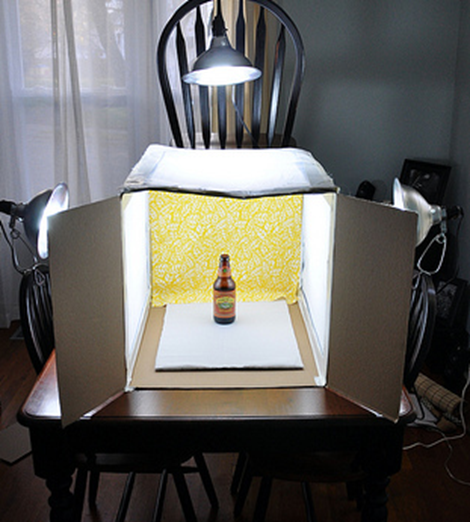
Never Homemaker – How to Build a Light Box
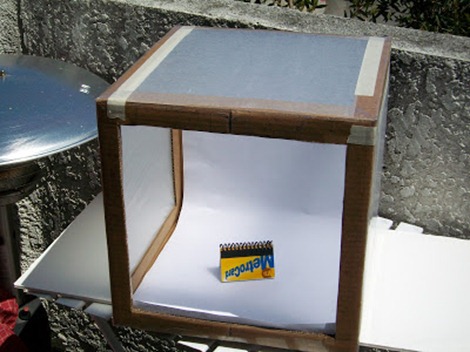
Radmegan – Sun Powered Light Box
You’ll find one more example with some photo tips at The Dapper Toad.
—————————————————————————————————-
Now you know how to do it, so get busy and create a light box!
It’s time to take some fresh photos for your shop. Don’t forget that multiple angles help show off your product. It takes a bunch of photos to get a few good ones…so snap, snap, snap away!
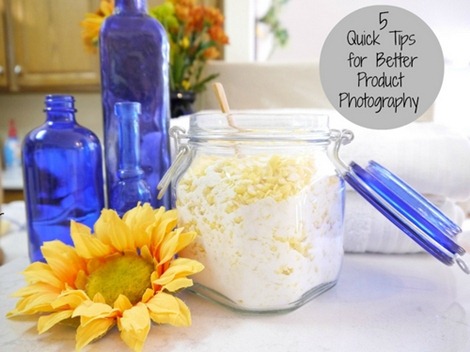
You might enjoy reading this post…5 Quick Tips for Better Product Photography.
Take a look around Etsy and see what product photos for inspiration. As you scroll down the page you’ll notice certain types of photos catch you attention and I bet they all have great lighting!
Practice makes perfect…or close to it. There’s always room for improvement when it comes to product photos, so keep updating you photos as your skills increase.
Do you have a light box? Do you use natural light? I’d love to hear your photo success tips in the comments!
~Kim
I’ve been using a light box, but it seems like darker backgrounds are gaining some attention now.
I’ve got nice dark brown hard wood floors, going to try some natural light today and a darker background.
Wish me luck!!
I think that’s a great idea! Mixing it up a bit is always a good idea. You never know what’s going to catch the buyers eye and bring them back to your shop.
Adding simple elements behind your product or different colors and textures can work awesome. You just have to keep it simple.
I love the idea of the wood floor. I’ve actually done that before and had it turn out nice. Our floors had a glossy finish, so I really had to watch out for the reflection.
Feel free to add a link in the comments to your new product photo when you’re done.
~Kim
Lighting is a huge struggle for me. The products I sell are very shiny, so reflection is my biggest enemy. I use a lightbox to diffuse the light coming in from the sides, with no light coming in from the top, which fights the glare, but my pictures end up being pretty dark. I do my best to fix it with photoshop… but I am still pretty disappointed with my product pics.
This is a great post and I just wrote about it in my blogging lessons recap. The absolute importance of product photos. One of the things that I have found is that I take the opportunity when we have days with great natural sunlight and take as many product shots as I can on that day for various projects and crafts. I use 2 white foam boards that are easily ported to various rooms and locations depending on where the best light is. That has completely changed how I take photos!
Great post! I try to photograph outside in natural light whenever possible, but it can be a challenge in Ohio weather! We had a light box we used for awhile, but it was hard for us to store and it got very tattered. 🙂 I love photos that have little props in them as well.
Here’s a link to the new listing/photo.
Just on my floor beside a nice big window. Just natural light, nothing else.
Please let me know what you think!
https://www.etsy.com/listing/124109586/custom-made-garden-decor-flower-garden
This is a great post – when it is nice outside, the last thing I think of is “let’s get some PRODUCT pix.” LOL. I Make the kids go out and play!! Must read all of this info and then plan better to get the better shots you all talk about! Bane of my existence – photography!
I made myself a lightbox a few years ago, and it has made all the difference. I’d love to see a tutorial about props — what to use to create the feel you’re going for in the photo or with the item up for sale, which kinds of materials photograph best (I was on the hunt for a pretty vintage dish for ages, and I found a beautiful one, but it photographs kind of shiny, which was a disappointment). If you do this pretty please shoot me an email, I’d love to make sure I see it!!
We used to use a lighting box but we have scarves and got new mannequins to spruce up our photos after feeling they weren’t up to snuff. Along with that we got professional lighting and backdrop for a great price after shopping around. Its taken a lot of time to get to this point. Practice and trying new things is key. Also. Fotofuze.com. We use photoshop but are really happy using fotofuze to give our products that extra zing.
I’ve used outdoor shots. I like them, with wind too, sometimes my scarves look like their dancing 🙂
https://www.etsy.com/listing/112041848/royal-bleu-silk-scarf-alpaca-wool-scarf
Otherwise I have very sunny house! Lol , all natural light in my shop … It’s hard to put a scarf in a light box!
I use natural light and I use old wine crates for a weathered wood background. I used to have my photography setup on my front porch, since it has the most windows and the best natural light. But it’s not insulated or heated, so a few months ago when it got too cold for me to photograph out there, I moved my setup to my guest room near the window.
I just caught this blog and I would love to try the light box method but I make large size white quilts with a pop of fabric prints for color. Every one of my pictures look different (the white portion I mean) even when I take them with the same camera, time of day, and natural light. I use a warm red background fabric which looks awesome but still the problem with the different ‘whites’ remains and I really would like to fix this any suggestions??? Thanks, Ann
I am currently setting up a little studio corner in my sewing studio so I won’t need to set it up each time I’m ready to photography my work. Currently working on getting the right light( bulbs) as I live in the uk and it’s gloomy here. I recently had my photographer friend take shoots of some of my work for my Etsy shop but I obviously can’t go to her each time. I just don’t feel confident doing a great job but going to take your advice and keep playing around till I get it right
Product photography depends profoundly on the ability to shoot a photograph at close range. You need to be able to zoom into the product without distorting the photograph. This is very important. Choosing the lens that will remove distortion and keep your image sharp is one of the best purchases you will make for your business.
What a fascinating post! This way I do not have to wait for sunlight to click pics. Do you have ideas for making food photography too? I would so love to read that too!
I love the easy and inexpensive tips that you suggest. Thank you!
wow looking good
nice post